Why you’ll love this recipe:
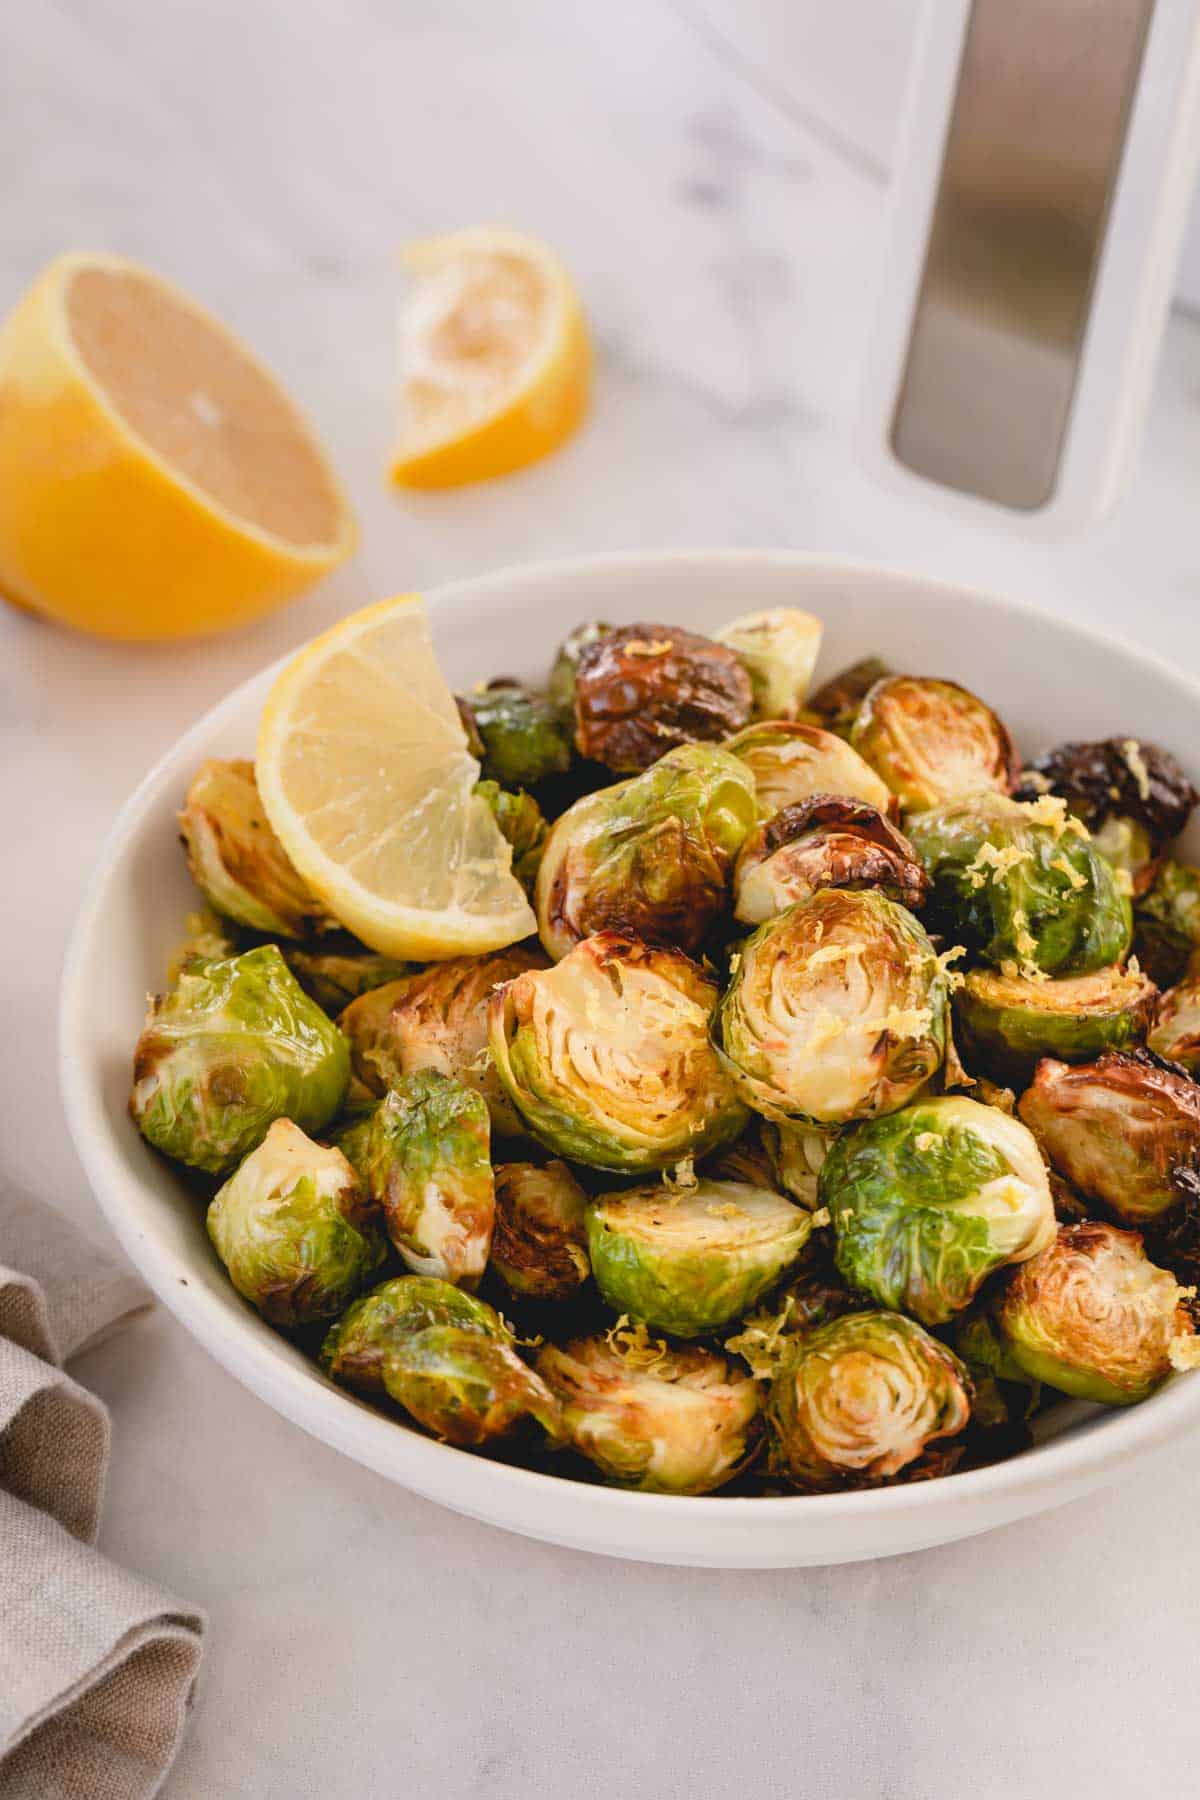
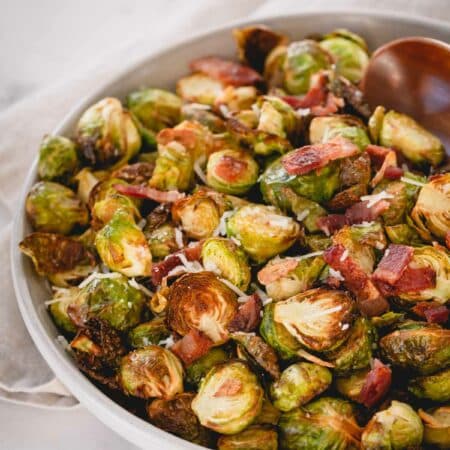
These air fryer brussels sprouts are delicious! They rival even the best oven-roasted vegetables with their dark, crispy edges and tender middles.
If you grew up on boiled or steamed brussels sprouts, these are going to rock your world. Air-fried brussels sprouts are a million times better and just as easy!
All you have to do is toss them in olive oil and seasoning, then dump them in the air fryer. I add sliced garlic halfway through for an addictively nutty crunch! There ready-to-eat in less than 25 minutes. Serve them up as a side dish or devour them as a salty snack.
If you haven’t tried air frying yet, you’re in for a pleasant surprise. Air fryers heat up super quick and “fry” foods for a crispy exterior without the need for too much oil. They work magic on veggies, fries, and even chicken tenders.
Key Ingredient Notes:
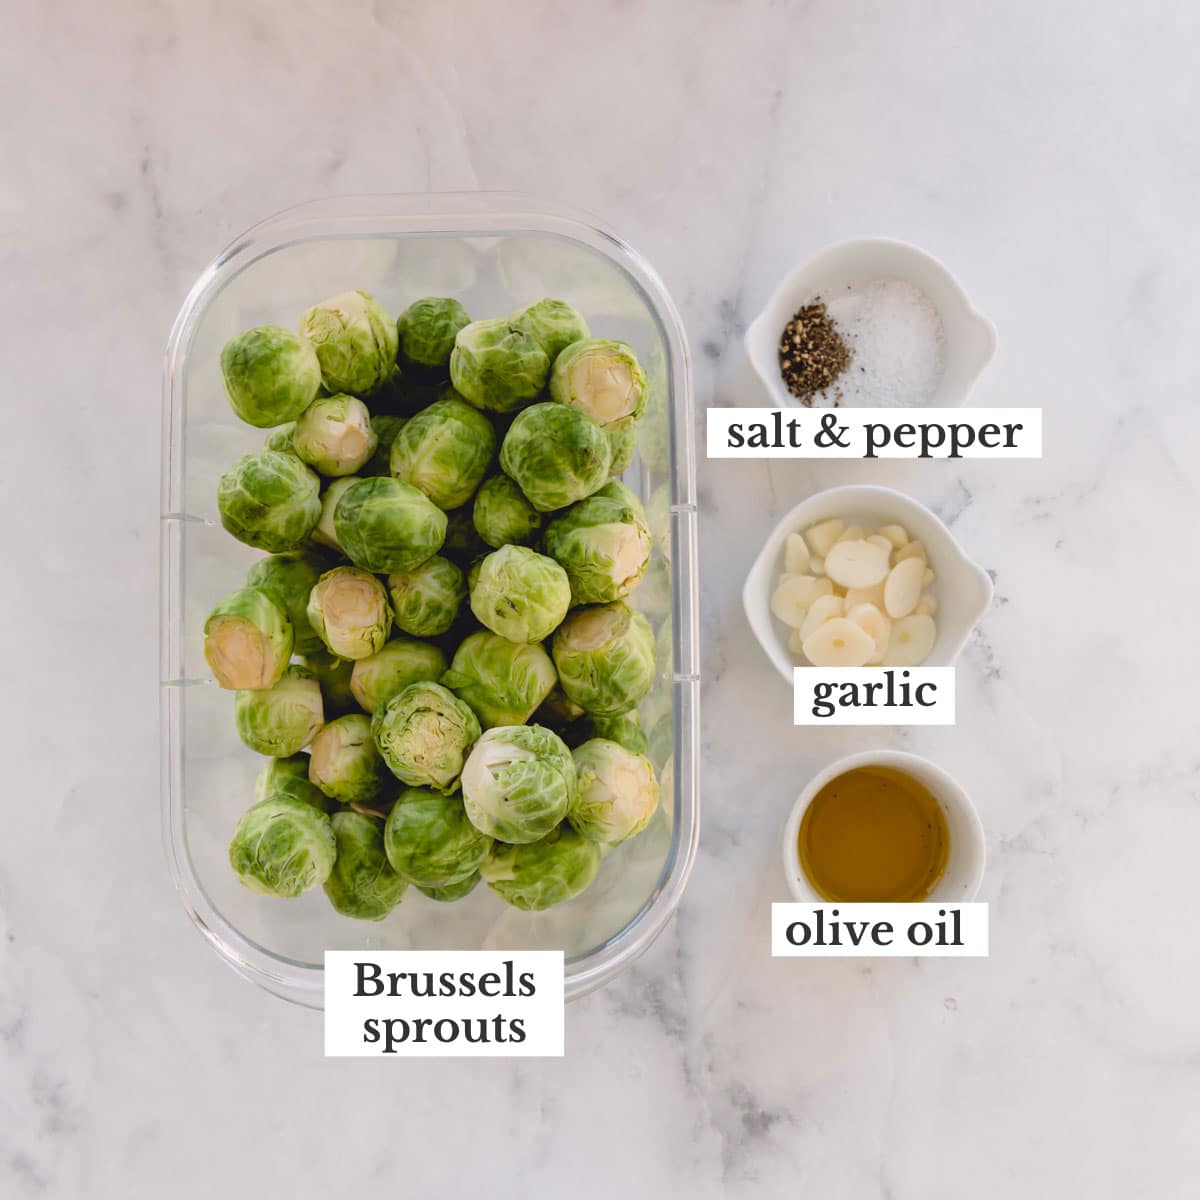
- Brussels sprouts – Look for brussels sprouts that are green and firm with tightly layered leaves. Brussels sprouts vary widely in size so be sure to adjust the timing accordingly. If yours are huge, you may need to increase the time by a few minutes.
- Olive oil encourages the outer leaves to crisp in the hot air fryer. Technically any oil works, but olive oil adds a complex flavor that can’t be beaten.
- Salt & pepper – Don’t forget to season! Even a fantastic dish will taste flat and one noted without proper seasoning.
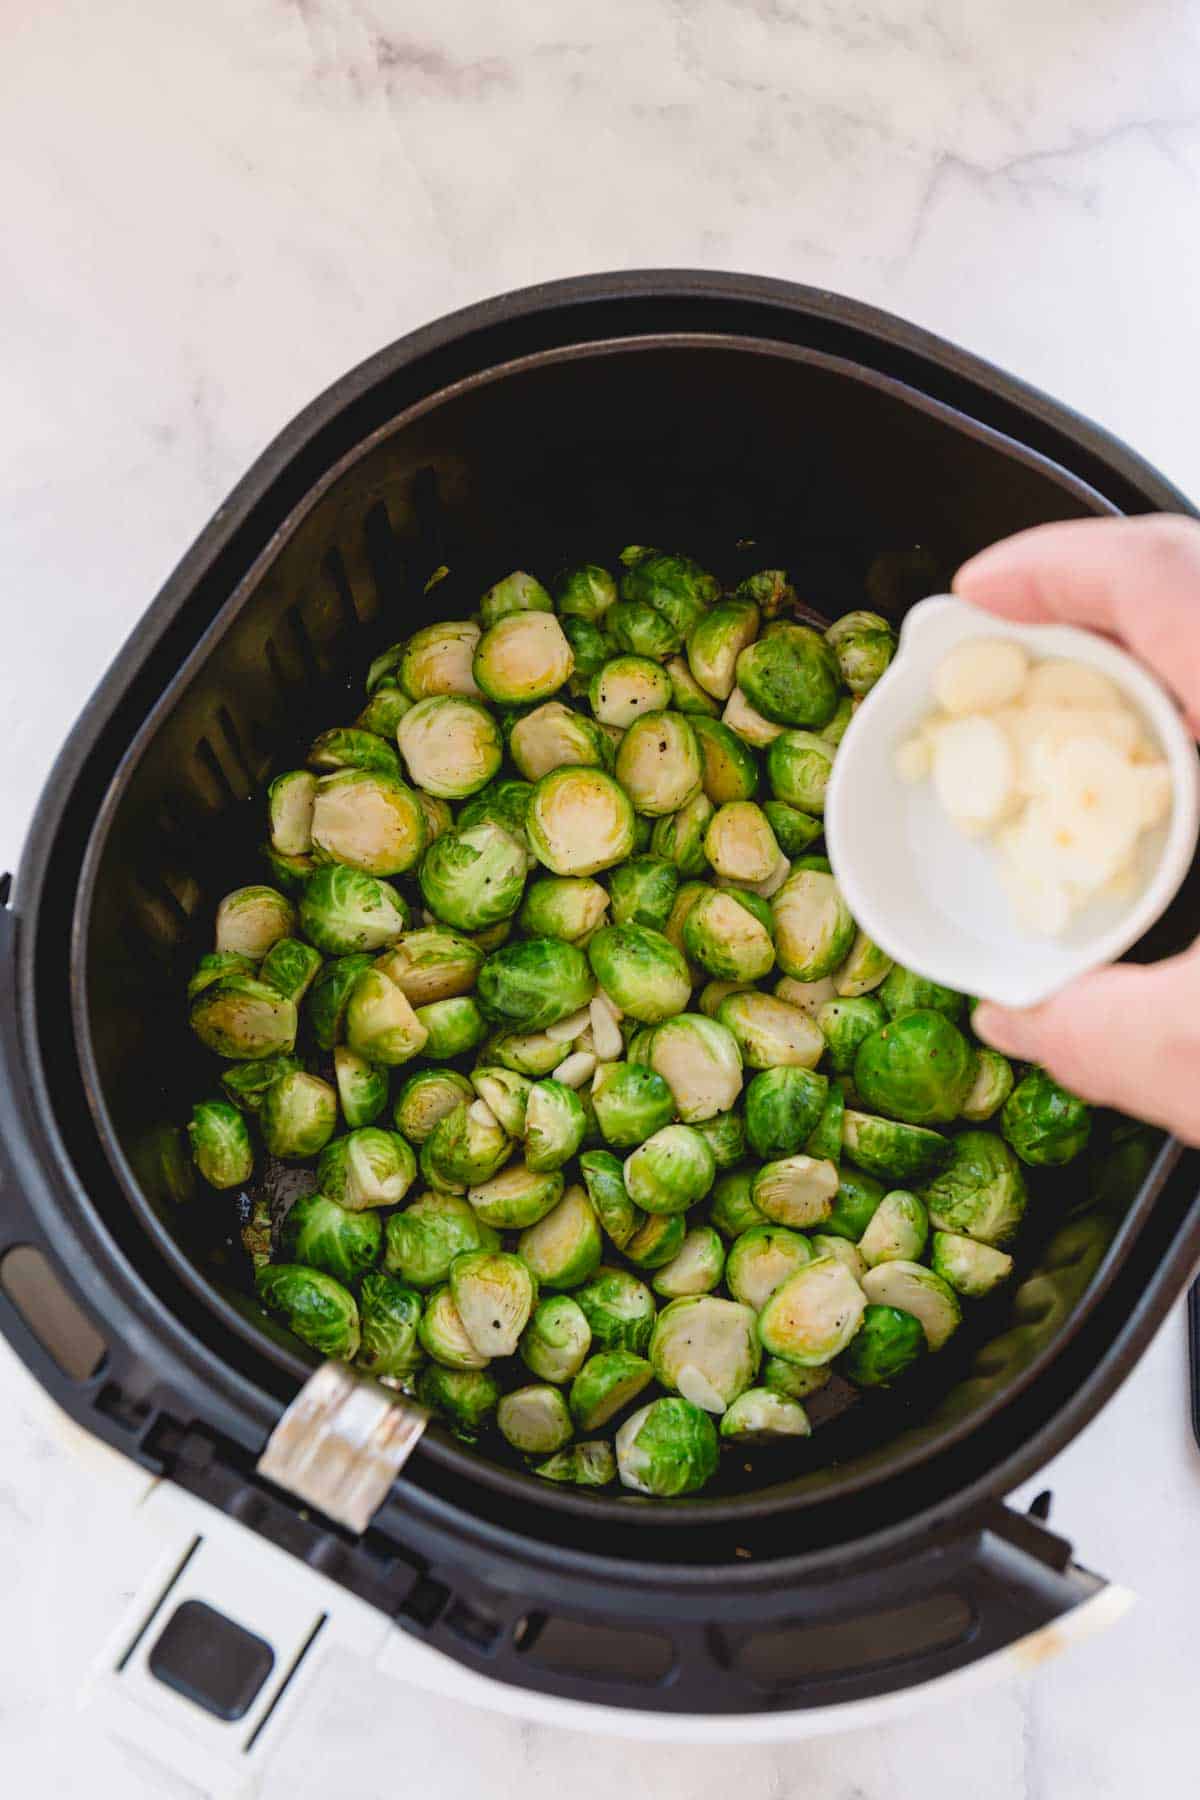
- Garlic – Garlic is added halfway through so it doesn’t burn. The garlic caramelizes and turns delightfully nutty.
How to cook brussels sprouts in an air fryer:
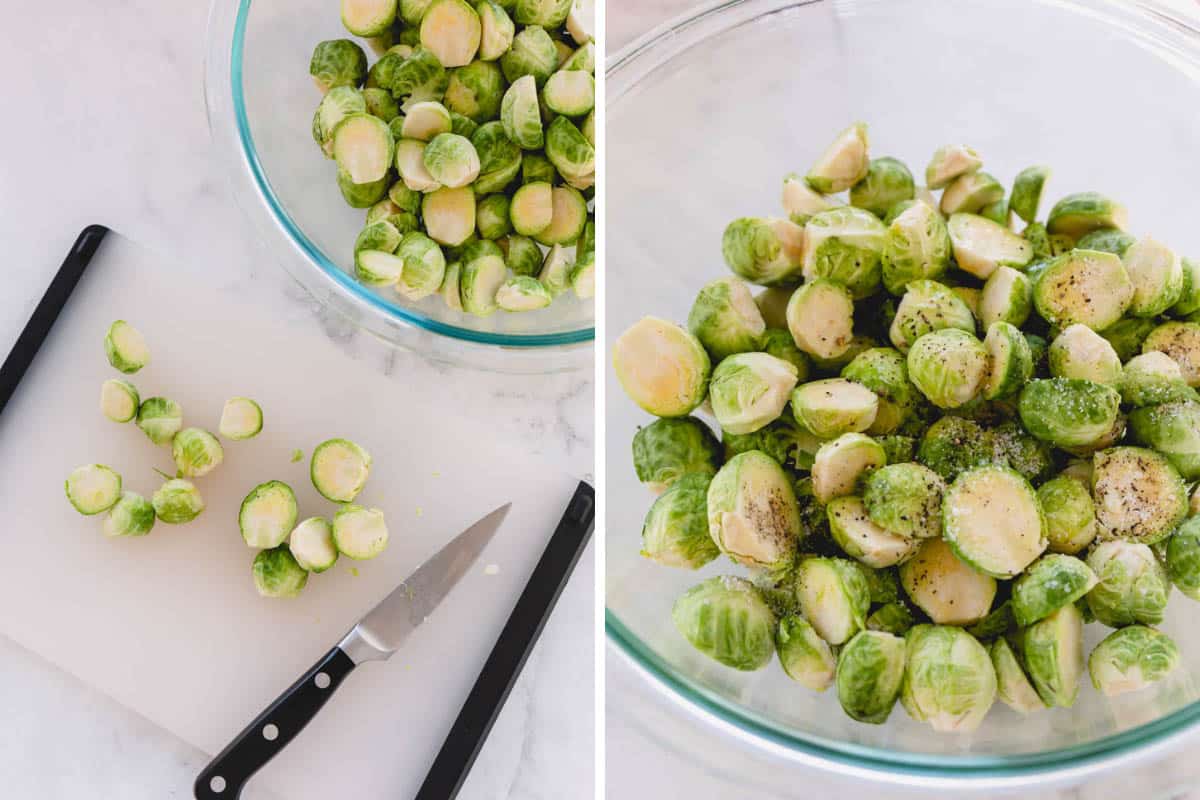
- Trim the brussels sprouts first, then half them lengthwise. The dried-up part of the stem at the bottom of the sprout is tough and chewy, so you’ll want to cut it off.
- In a large mixing bowl, combine the brussels sprouts with olive oil, salt, and pepper. Toss until evenly coated.
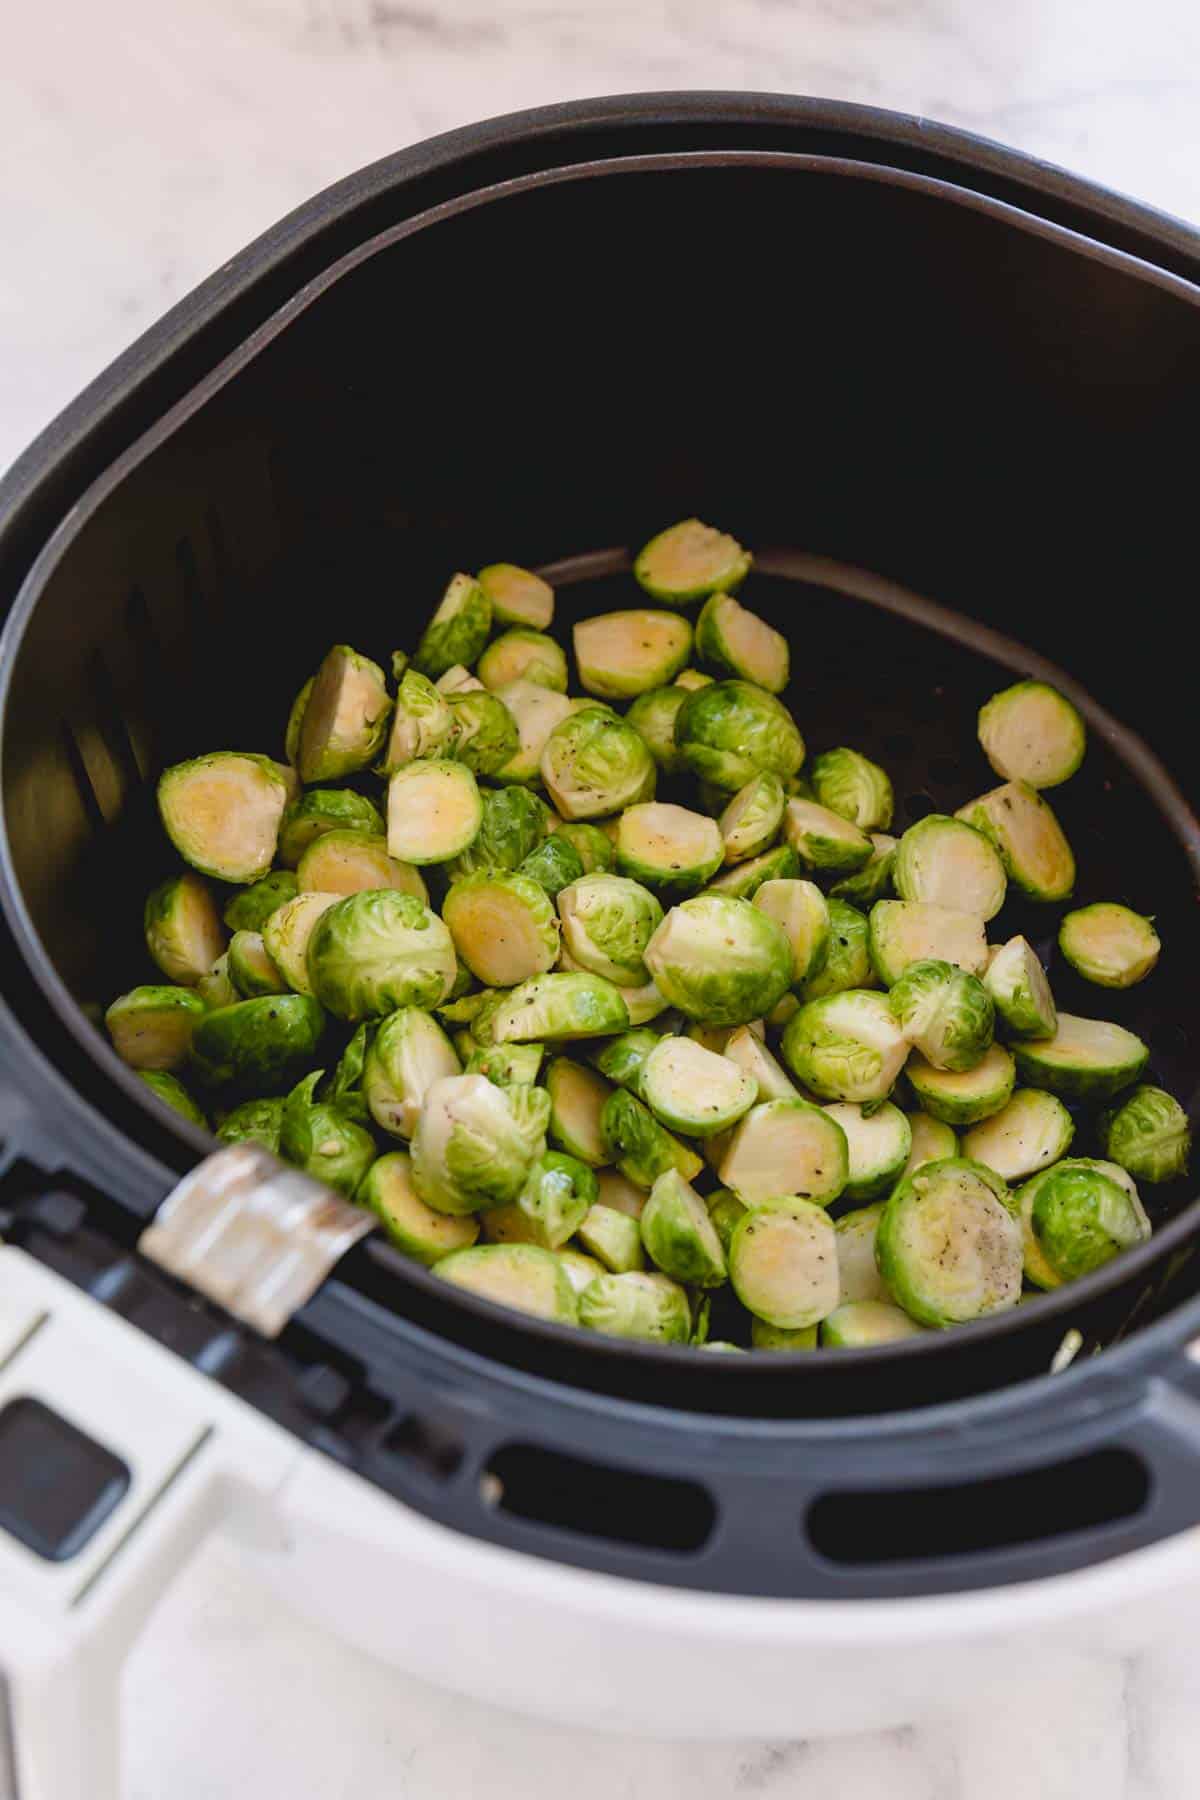
- Place the seasoned brussels sprouts in the air fryer basket in an even layer. Cook for 8 minutes at 375 degrees Fahrenheit.
- Add the garlic slices and give it a few good shakes.
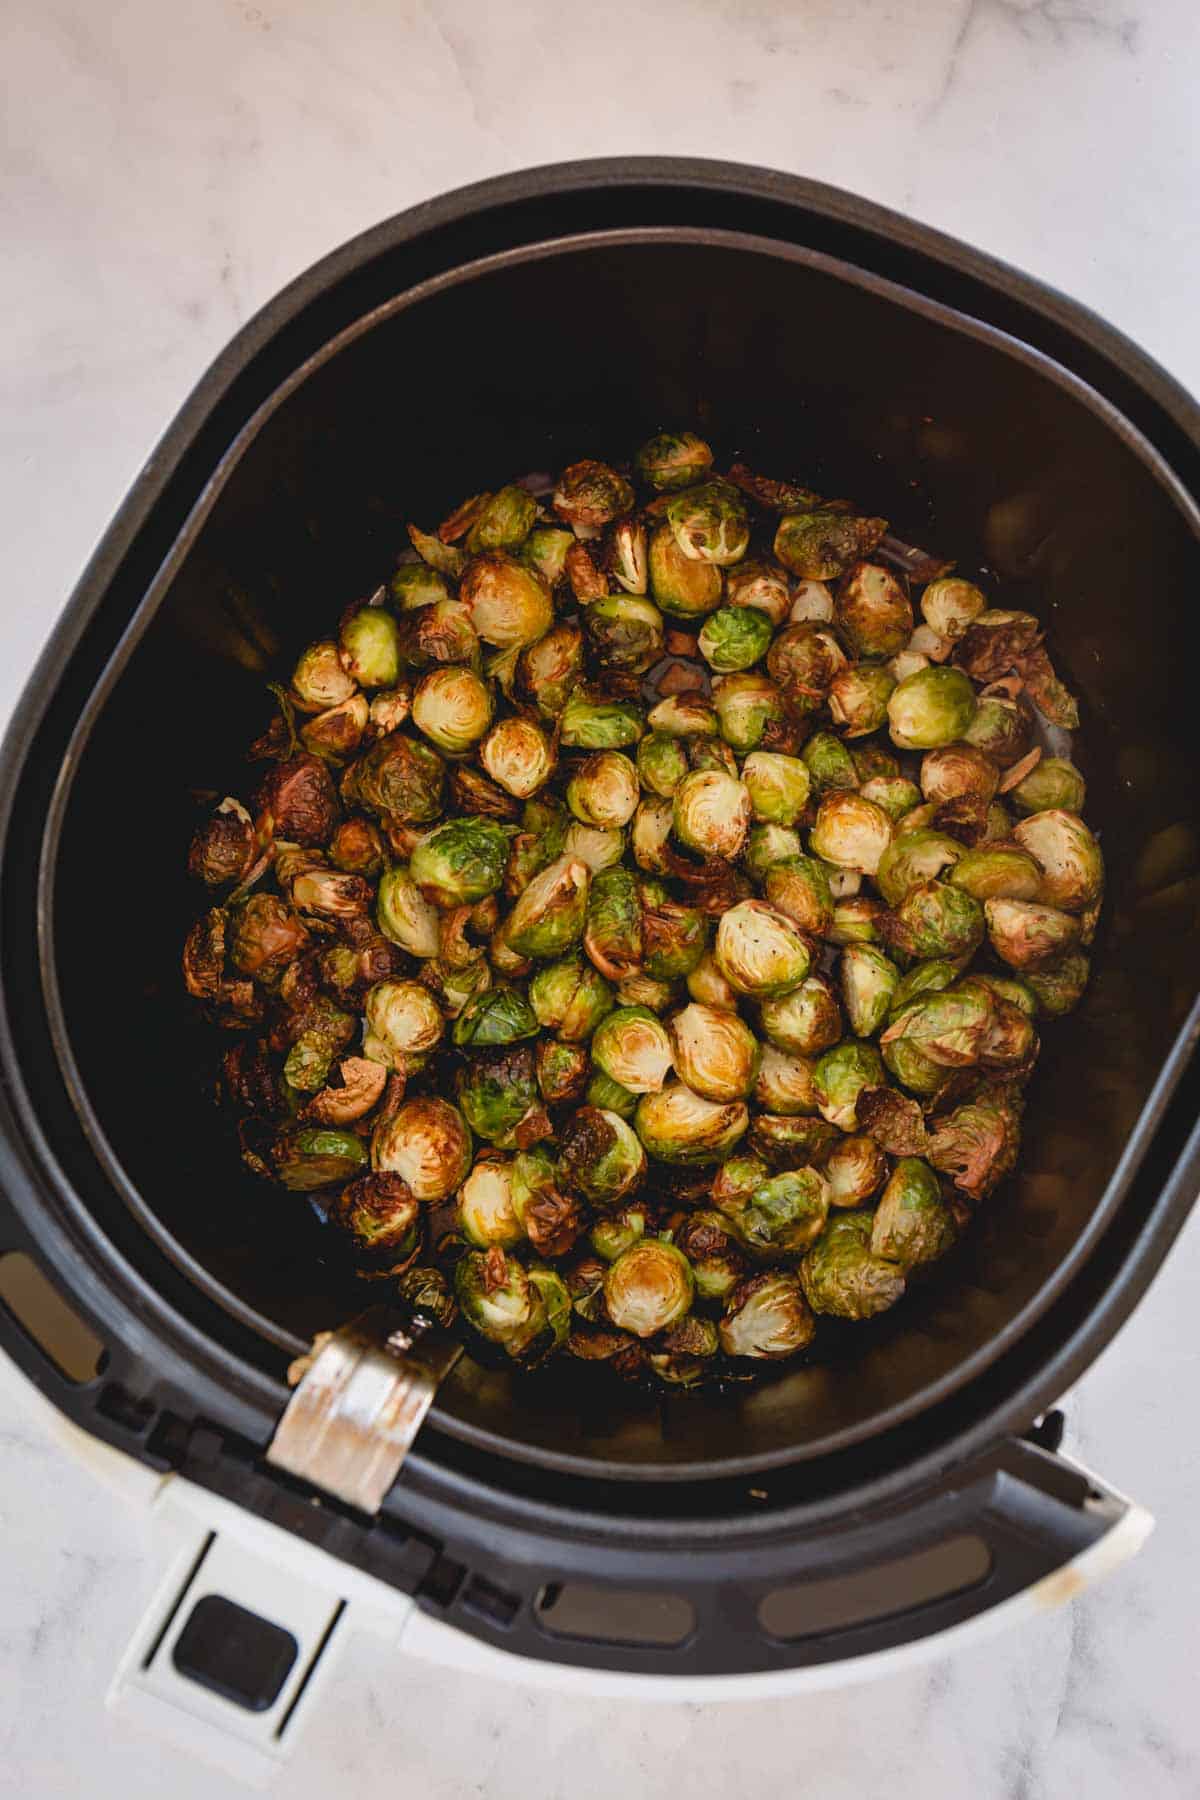
- Continue to cook for another 8 to 10 minutes, or until they are crispy on the outside and tender on the inside.
Roasted Brussels Sprouts Variations:
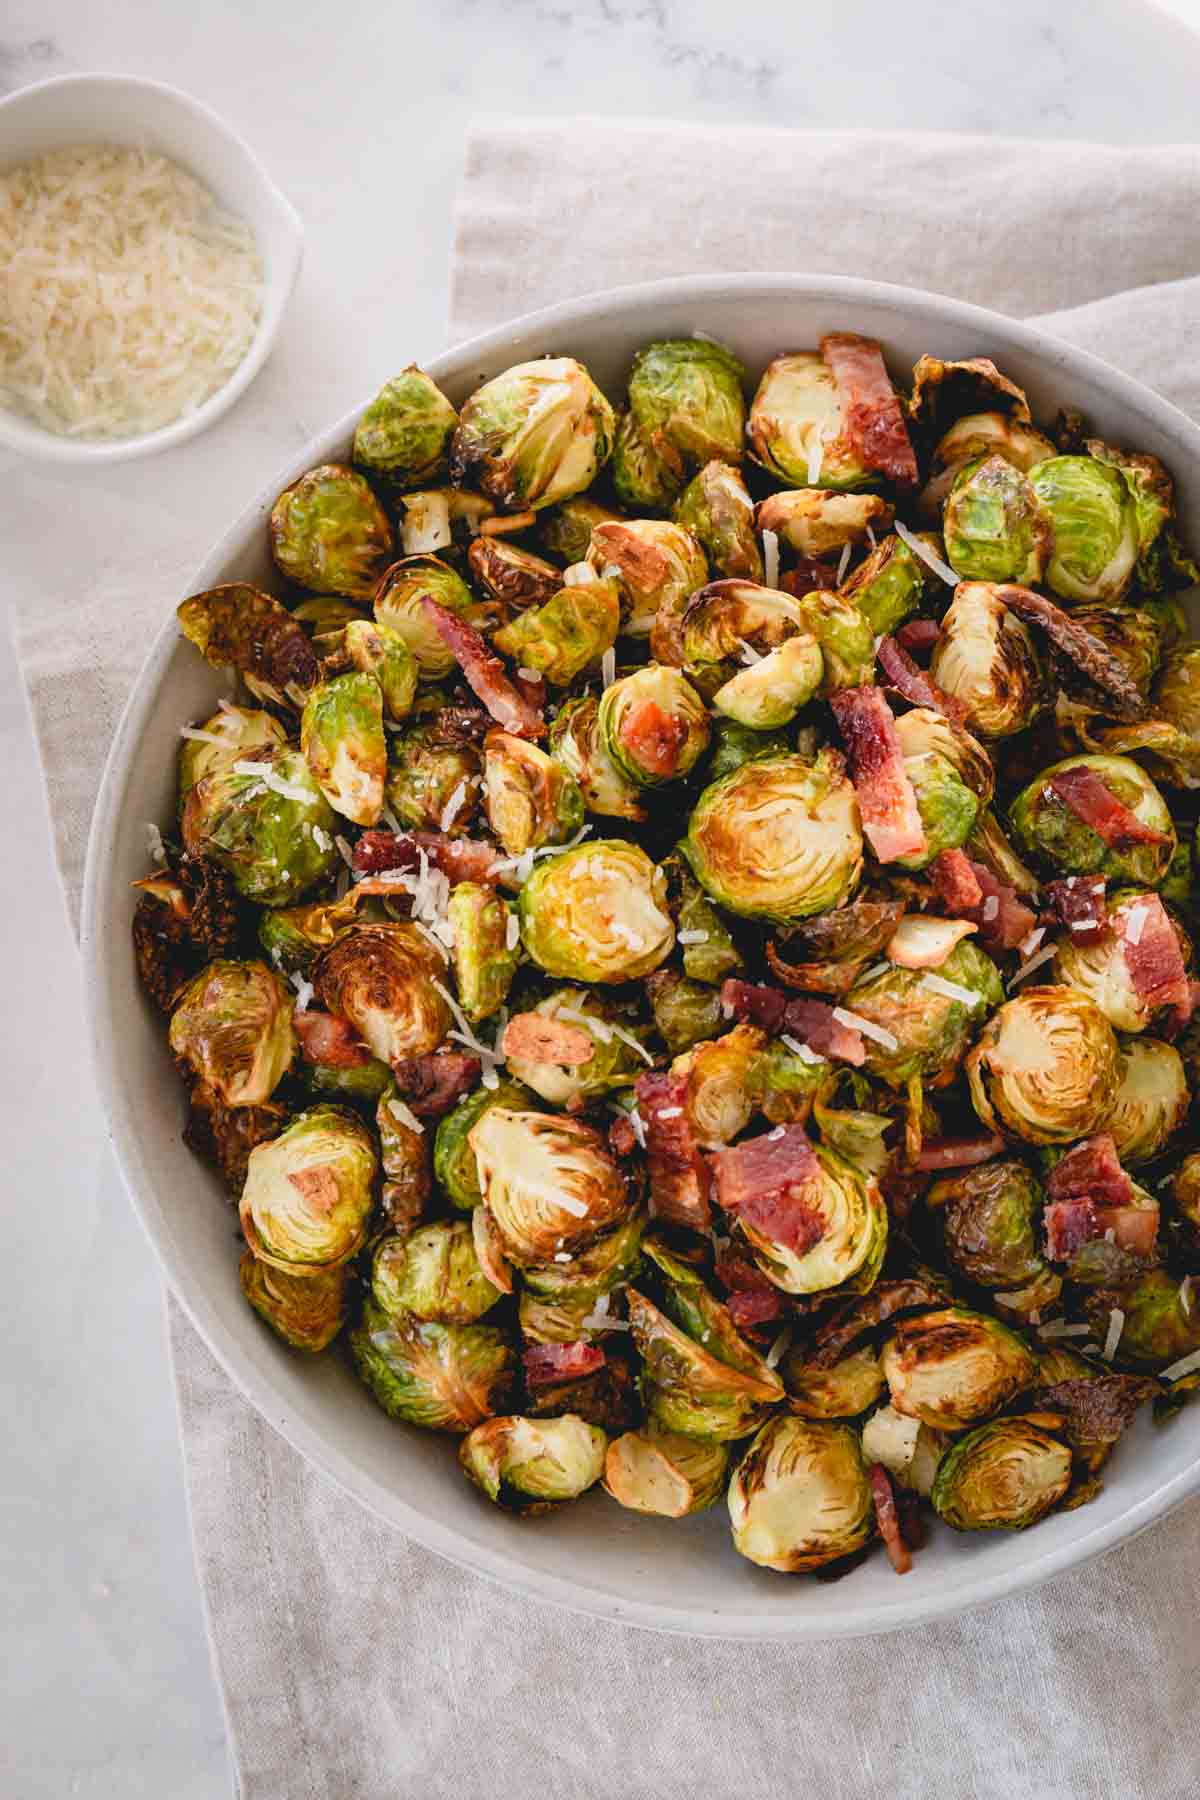
- Bacon + Parmesan – Toss with bacon bits or crumbled bacon and shredded parmesan! This combo is to die for.
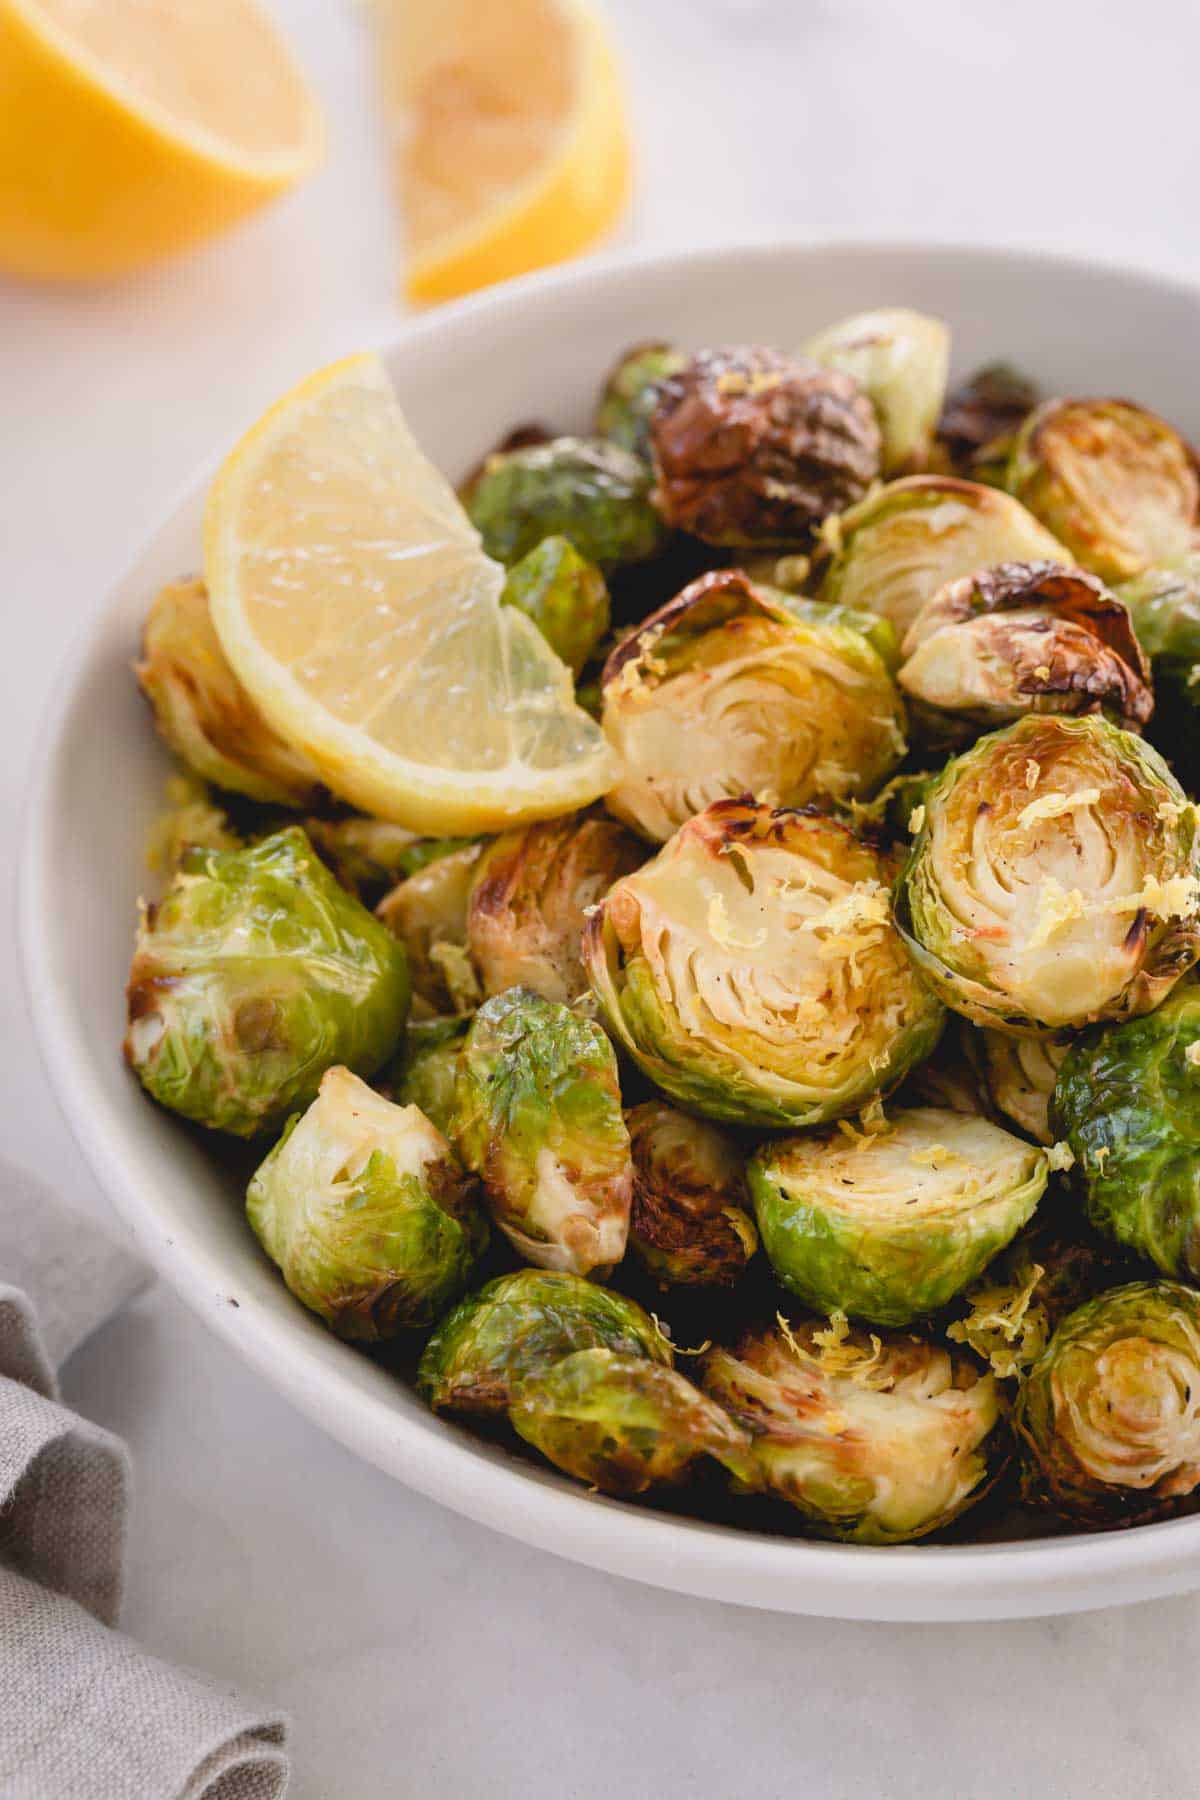
- Lemon + Almonds – Toss with lemon zest, a squeeze of fresh lemon juice, and slivered almonds. If you have time, toast the almonds first for a nice crunch.
- Aioli – An aioli is just a fancy word for flavored mayo. Make a lemon aioli or a siracha aioli for a boost of flavor. Use it as a dip or drizzle on top of the air-fried brussels sprouts before you dive in.
- Herbs – Add fresh cilantro or parsley at the end.
- Hot honey + Bacon – For a bit of sweet heat! Drizzle with hot honey and toss with bacon crumbles.
Expert Tips:
- Avoid the temptation to turn up the heat. 375 degrees is the perfect temp for roasted brussels sprouts. If you roast them at too high a temperature, the edges will burn before the insides can cook.
- Don’t forget to shake them! A good shake halfway through ensures they will caramelize and crisp but not burn.
Storing Tips:
- To store: Transfer the cooked brussels sprouts to an airtight container and store in the refrigerator for up to 4 days.
- To reheat: You can reheat the brussels sprouts in the oven or the air fryer. The microwave works too, but you will lose the crisp texture. Reheat in the oven or air fryer at 350 degrees for 5 to 7 minutes, or until they’re hot and crisp. If using the microwave, reheat on a microwave-safe plate until hot throughout.
- To freeze: I don’t recommend freezing brussels sprouts, because they lose their texture and get soggy. If you don’t mind a softer texture, you can freeze them in a freezer-safe container for up to 2 months. Thaw in the refrigerator, then reheat in the oven.
FAQs:
If you don’t shake the brussels sprouts halfway through the cooking process, the brussels sprouts will get too hot on one side and burn instead of caramelize. If you cook them too long, they may burn as well. It’s really a preference on how crispy and caramelized they are. If you like them deeper brown and crisper, cook them longer. If you like them lightly golden and not as crispy, decrease the cooking time.
It depends on how big your brussels sprouts are and how crispy you like them! For this recipe, I cooked them for 15 to 18 minutes, shaking them once halfway through. I found this to be the perfect amount of time for crispy, brown edges and a fork-tender texture.
I find it best to cut them in half before roasting. Doing so gives you the optimal size for caramelized edges and a cooked-through center. If the brussels sprouts are whole, the edges burn before the centers can cook.
More Delicious Side Dishes
Air Fryer Brussels Sprouts
Equipment
Ingredients
- 1 pound brussels sprouts trimmed and halved lengthwise
- 2 tablespoons olive oil
- ½ teaspoon coarse kosher salt
- ¼ teaspoon ground black pepper
- 3 garlic cloves sliced
Instructions
- Trim the brussels sprouts and halve them lengthwise.
- In a large mixing bowl, combine the Brussels sprouts with olive oil, salt, and pepper until evenly coated.
- Place the seasoned Brussels sprouts in an even layer in an air fryer basket.
- Cook for 8 minutes at 375°F.
- Add garlic slices and give it a few good shakes. Continue cooking for another 8-10 minutes, or until they are crispy on the outside and tender on the inside when pierced with a fork.
Notes
– To store: Transfer the cooked brussels sprouts to an airtight container and store in the refrigerator for up to 4 days.
– To reheat: You can reheat the brussels sprouts in the oven or the air fryer. The microwave works too, but you will lose the crisp texture. Reheat in the oven or air fryer at 350 degrees for 5 to 7 minutes, or until they’re hot and crisp. If using the microwave, reheat on a microwave-safe plate until hot throughout.
– To freeze: I don’t recommend freezing brussels sprouts, because they lose their texture and get soggy. If you don’t mind a softer texture, you can freeze them in a freezer-safe container for up to 2 months. Thaw in the refrigerator, then reheat in the oven.
Nutrition
* Disclaimer: All nutrition information are estimates only. Read full nutrition disclosure.

Sharing of this recipe is encouraged and appreciated. Copying of full recipe to any social media is prohibited.

Comments + Reviews