Why you’ll love this recipe:
Most chunky chili recipes simmer for hours to develop a deep flavor profile. Thanks to an electric pressure cooker, this satisfying chili is ready in just 90 minutes!
- Perfect for game-day or a party
- Freeze for a busy weeknight
- Simple ingredients with only 25 minutes of prep
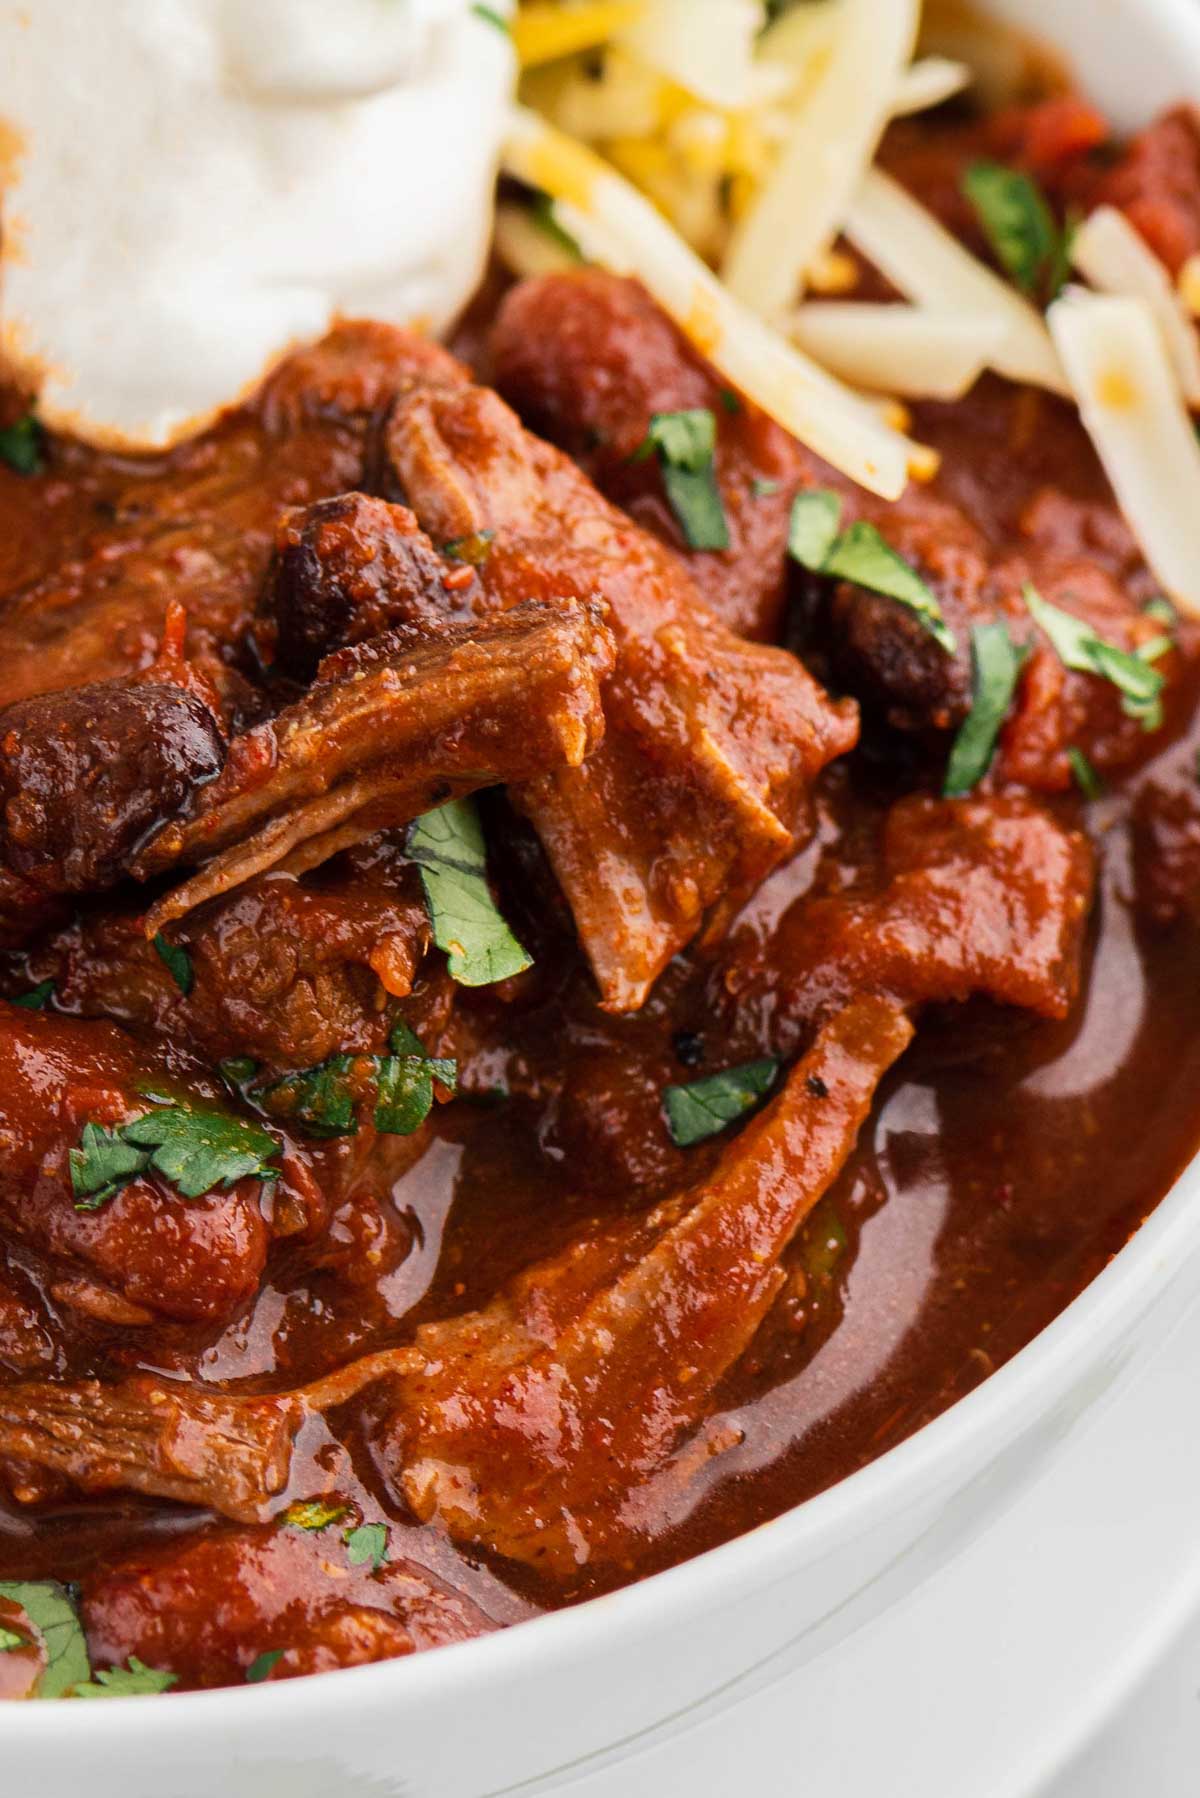
Toppings transform a hearty bowl of stew meat chili into a family-friendly affair. Top with sour cream, green onions, cheddar cheese, tortilla chips, sliced avocado, pickled jalapenos, or fresh cilantro for an extra burst of flavor.
Key Ingredient Notes:
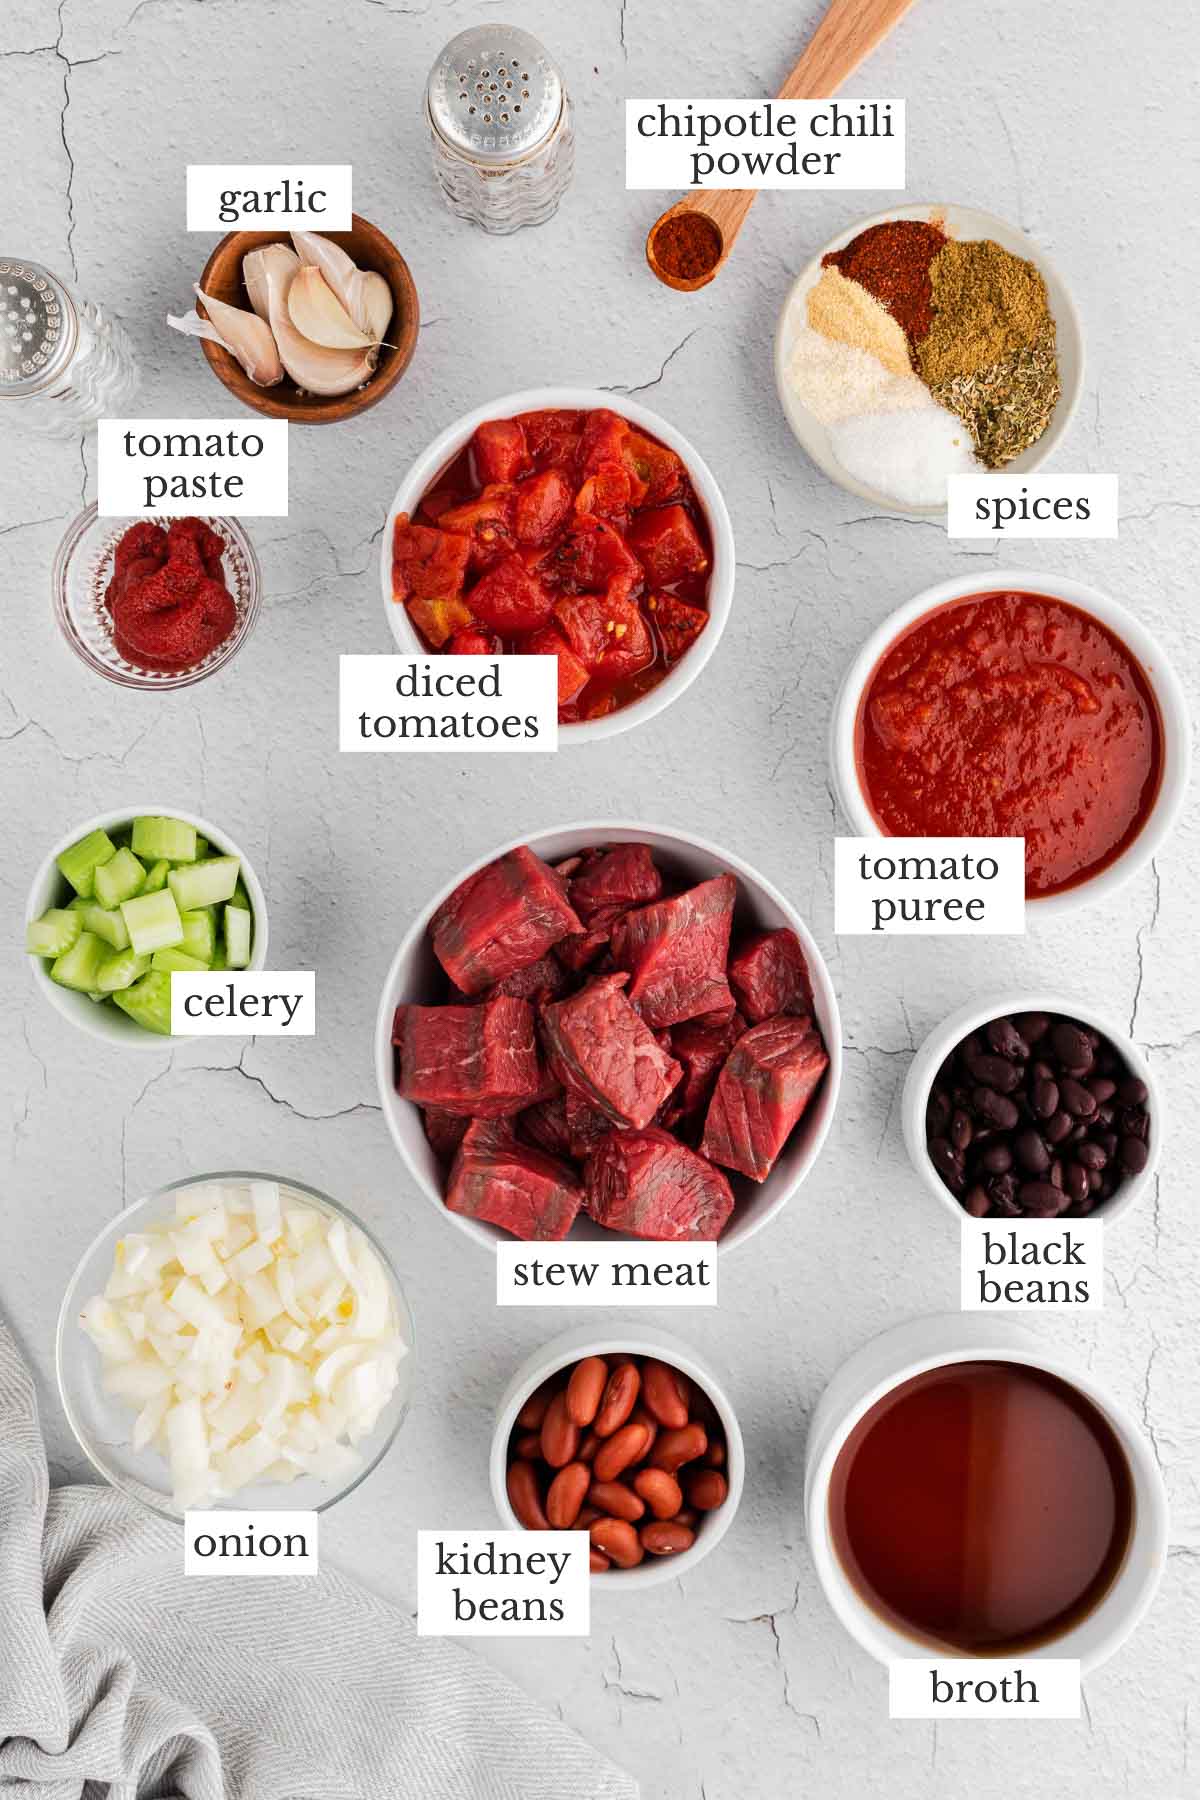
While the ingredient list may seem long, it’s mostly spices and pantry staples.
- Stew meat – If you can’t find pre-cut stew meat, cut a chuck roast into 1-inch cubes and trim the excess fat. Typically, stew meat benefits from slow cooking methods, but the instant pot cooks it quickly.
- Aromatics – Sautéed celery, onion, & garlic sweeten and mellow as they cook.
- Tomatoes, paste, & puree – Tomato paste thickens the beef stock base.
- Beans – Black beans and kidney beans are hearty beans that hold their shape while cooking.
- Beef Broth – Beef broth creates the flavorful liquid base. Store-bought beef broth can be high in sodium, which is why I opt for reduced-sodium broth.
- Spices – Chili powder, cumin, kosher salt, garlic powder, onion powder, oregano, and black pepper add plenty of flavor to the broth.
How to make this recipe:
Stew meat chili has three simple steps! If you’re short on time but want fork-tender chunks of beef, the pressure cooker is the way to go.
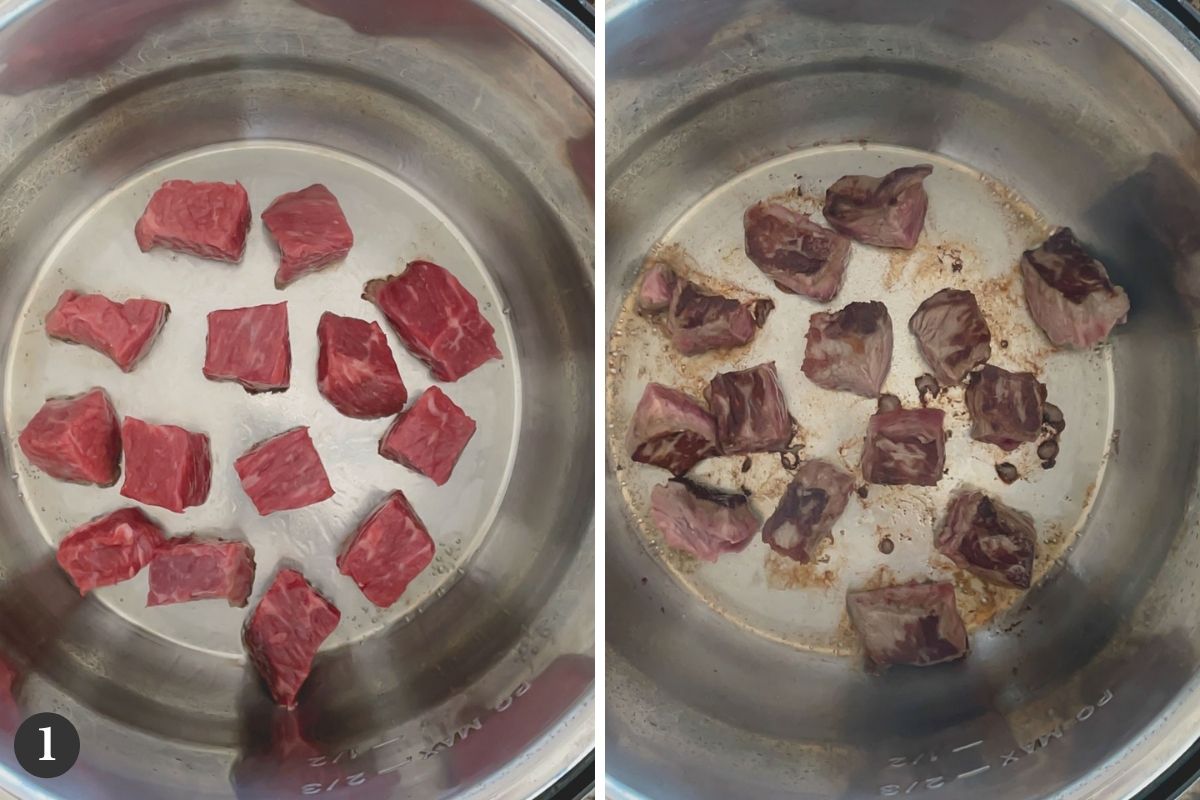
Brown the meat:
- Set your instant pot to sauté, let the pot heat up and then add the oil. Meanwhile, dry the meat chunks with a paper towel to ensure the meat will caramelize. Moisture creates steam which prevents caramelization!
- Work in batches so you don’t overcrowd the pot. Add beef chunks in a single layer and brown the meat on all sides. The beef chunks are ready to flip when they release gently from the pan. Don’t be afraid to let them get dark brown for a deep, rich flavor!
- Use the tongs to transfer the seared meat onto a clean plate, then repeat with the leftover meat.
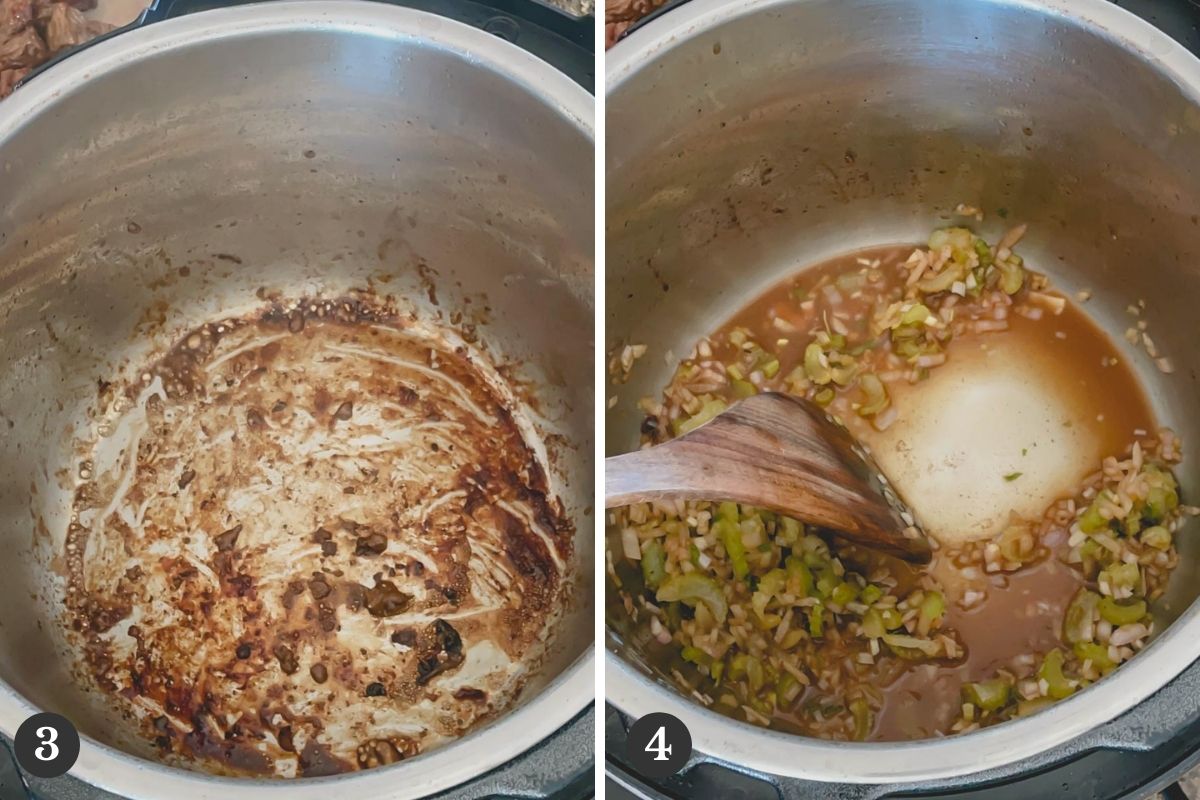
Deglaze the pot and saute the veggies:
- Add chopped onions and celery, stirring frequently, until the veggies turn translucent. Add a splash of broth and use a wooden spoon to scrape the flavorful brown bits off the bottom of the pot. Doing this releases all the flavor that’s stuck to the pot.
- Stir in the seasoning.
- Add tomato paste and garlic, sauté for another minute or so.
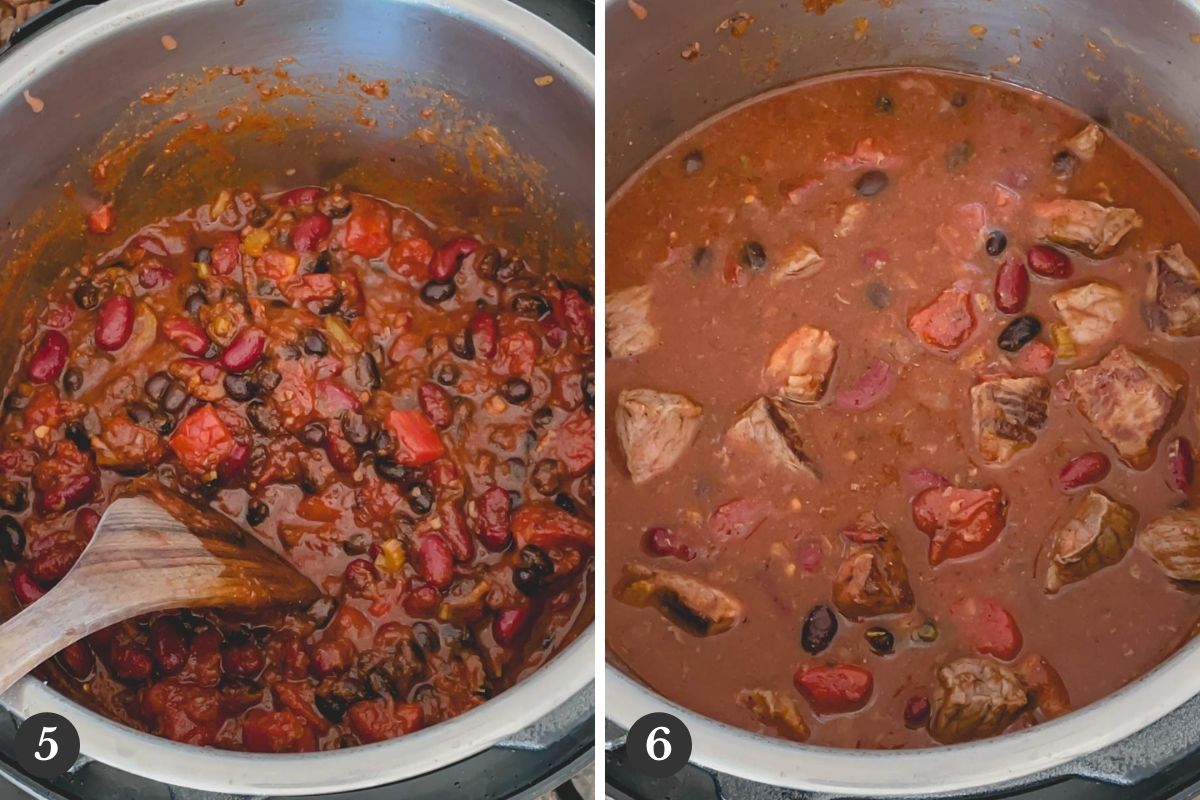
- Add tomato puree, diced tomatoes, and beans. Give the mixture a good stir, then add the beef chunks with their juices and the broth. Stir one more time.
Be sure to deglaze the pot well, scraping any pieces that’s stuck to the bottom. You don’t want anything stuck on the bottom, or you’ll get a “BURN” notice and the pot won’t come to pressure.
Pressure cook:
- Cover the pot, set the valve to sealing, and set the Instant Pot for 25 minutes on high pressure. Remember, it takes time for your instant pot to come to pressure. For my Instant Pot, it takes about 14 minutes to come to pressure.
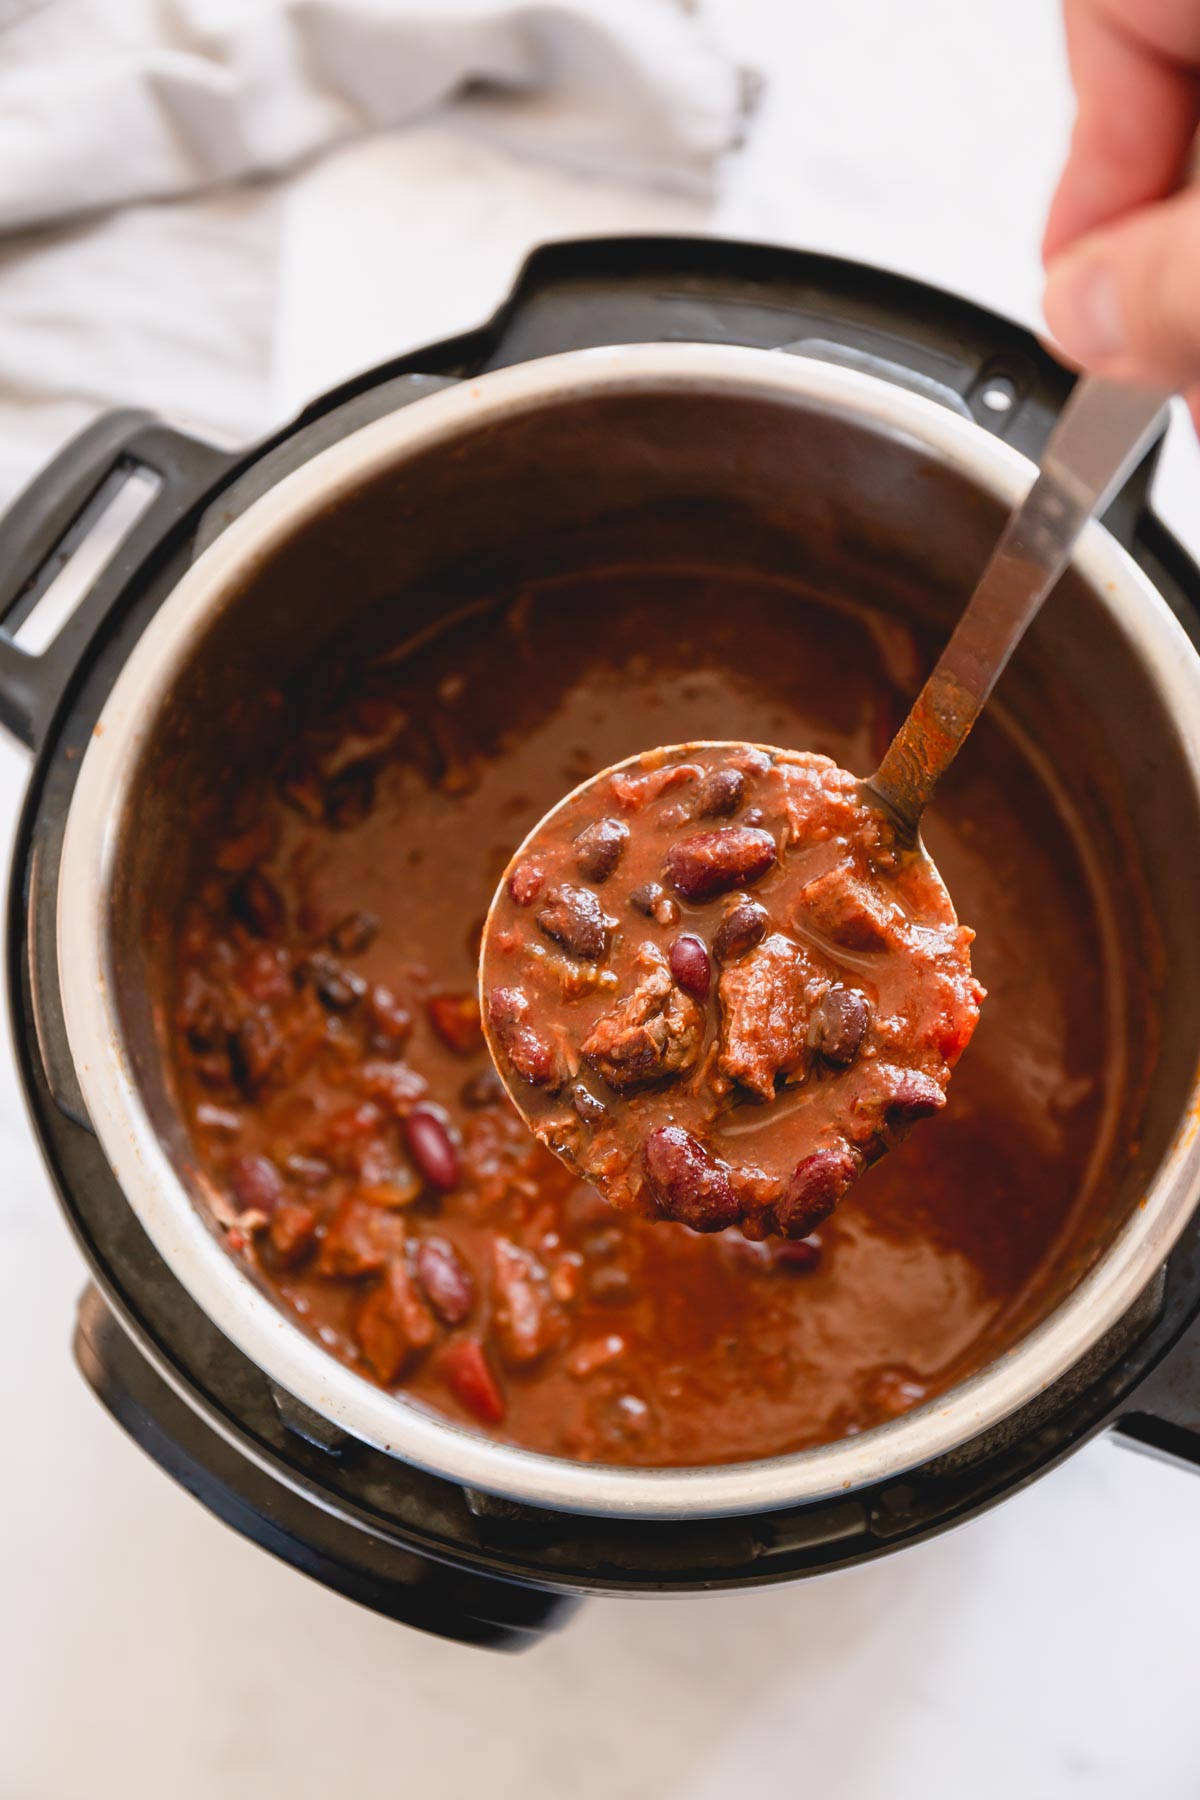
- When the time is up, let the pressure release naturally for 15 minutes, which means let the pot sit untouched. Then carefully turn the valve to venting. Once the pin drops, carefully open the lid – it’s extremely hot!
- Taste and season if necessary. Enjoy with delicious toppings!
Expert Tips:
- To make it spicy, add a can of green chiles the same time as the tomatoes and beans.
- For less heat, reduce the chili powder to one tablespoon.
- Always dry your meat before you sear it! This ensures the beef will caramelize when it hits the hot pan. Excess moisture will cause the meat to steam.
- Give the meat some space when searing it. If you layer the meat or overcrowd it, the beef won’t brown properly.
- If the chunky chili tastes too acidic, you have two options. Add 1/2 teaspoon of baking soda to neutralize the acid or a tablespoon of sugar to mellow it.
- For a chunkier chili, replace the tomato puree with diced tomatoes.
Time-Saving Tips:
- Make chili ahead of time – Chili tastes even better on day two! All the flavors sit and permeate the broth and beans. Make it a day in advance then all you need to do is reheat.
- Chop veggies – Even if you don’t have time to make the chili early, you can always chop the veggies! Chop the celery and onions, mince the garlic, and drain the beans. Store everything in the refrigerator until ready to cook!
- Freeze individual portions – Freeze quart-size bags of chili for quick meals. Thaw in hot water to release it from the bag, and reheat in a covered saucepan on low, or in the microwave.
Storing Tips:
- Homemade chili can be stored in the refrigerator for up to 4 days in an airtight container.
- To increase its shelf life, freeze the chili in a freezer-safe bag or container for up to 6 months.
- For easy thawing, store the chili in shallow containers or laid flat in plastic bags.
- Defrost the frozen chili in the fridge overnight or thaw in hot water, then reheat in a saucepan on low heat or in the microwave.
Leftover Chili Ideas:
- Chili cornbread bake – Whip up a store-bought cornbread mix. Scoop the chili into small ramekins and top with cornbread batter. Bake at 350 degrees until the cornbread is done.
- Chili cheese dogs – Top hotdogs with the leftover chili with shredded cheese, and diced onions.
- Baked potato – Top a hot baked potato with shredded cheese, warm chili, and sour cream.
- Chili mac – Simply scoop the chili onto homemade or store-bought macaroni and cheese. Enjoy!
Chili Topping Ideas:
Stew beef chili is the perfect vehicle for savory, spicy, or crunchy toppings! Try one or all of these toppings to kick things up a notch.
- Hot sauce
- Sour cream
- Pickled jalapenos
- Cilantro
- Cheddar cheese
- Tortilla chips
- Sliced avocado
- Guacamole
- Green onions
FAQs:
Stew meat is typically made from a chuck roast with lots of connective tissue. When it simmers for a long period of time in a liquid, the connective tissue breaks down and the meat becomes tender.
This is why it’s perfect for beef stew or chili. In this Instant Pot recipe, the pressure makes the meat tender in a short amount of time.
This zesty chili recipe doesn’t need a side dish! If you can’t resist, a slice of cornbread, a baked potato, white rice, mixed green salad, or grilled cheese are great options.
Easy Instant Pot Chili

Instant Pot Chunky Beef Chili
Equipment
- Instant Pot
Ingredients
- 2 lb stew meat Note 1
- 1 medium onion chopped
- 2 stalks celery chopped
- 2 cups low sodium beef broth or water
- 5 garlic cloves minced
- 2 tbsp chili powder
- 1 tbsp cumin
- 3 teaspoons coarse kosher salt
- 1 teaspoon garlic powder
- 1 teaspoon onion powder
- 1 teaspoon oregano
- 1 teaspoon ground black pepper
- 2 tablespoons tomato paste
- 28 ounce can tomato puree Note 2
- 14.4 ounce can fire roasted tomatoes
- 15 ounce can black beans drained and rinsed
- 15 ounce can light kidney beans drained and rinsed
Instructions
To brown the meat:
- Set Instant Pot to “sauté” on high heat.
- Once the Instant Pot display reads “HOT”, add oil and heat it for a minute.
- Working in batches, add beef chunks in one layer and brown the meat on all sides, 3-4 minutes, removing the seared meat onto a clean plate and continuing with the remaining beef.
To sauté the veggies:
- Add chopped onions and celery into the now empty pot. Cook stirring frequently until onions begin to turn translucent, about 3 minutes. Add splash of broth (or water) to the pot and deglaze the bottom of the pan with a wooden spoon. (TIP: You don’t want anything stuck on the bottom, or you’ll get a “BURN” notice and the pot won’t come to pressure.)
- Stir in salt and spices and continue to cook for a minute.
- Then add tomato paste and garlic and saute for another minute.
- Add tomato puree, diced tomatoes and beans. Stir everything well and then add beef chunks with all the juices and broth. Stir everything once again.
To pressure cook:
- Cover the pot, make sure the valve is set to “sealing” and set the Instant Pot for Manual/Pressure Cook for 25 minutes on high. (NOTE: It took about 14 minutes for my Instant Pot to come to pressure.)
- Once the time is up, allow the pressure to release naturally for at least 15 minutes, and then carefully turn the valve to venting. Once the pin drops, carefully open the lid. Taste and adjust the salt if needed and serving with your favorite chili toppings.
Notes
- Homemade chili can be stored in the refrigerator for up to 4 days in an airtight container.
- To increase it’s shelf life, freeze the chili in a freezer-safe bag or container for up to 6 months.
- For easy thawing, store the chili in shallow containers or laid flat in plastic bags.
- Defrost the frozen chili in the fridge overnight or thaw in hot water, then reheat in a saucepan on low heat or in the microwave.
Nutrition
* Disclaimer: All nutrition information are estimates only. Read full nutrition disclosure.

Sharing of this recipe is encouraged and appreciated. Copying of full recipe to any social media is prohibited.


Comments + Reviews