Why you’ll love this salt and pepper chicken recipe
Forget the take-out! This quick and easy dinner recipe is finished faster than you can get delivery, and it’s going to be your new family favorite! Here’s just a few more reasons to love this recipe.
- A healthier version of the takeout favorite – This recipe uses a lighter crust and far less oil than its traditional takeout counterpart.
- It’s a simple recipe – It’s so easy to make, and it’s finished in less than 30 minutes.
- The whole family loves it – Everyone loves the simplistic flavor of this dish. It’s also versatile to easily suit everyone’s tastes.
Key Ingredients Notes
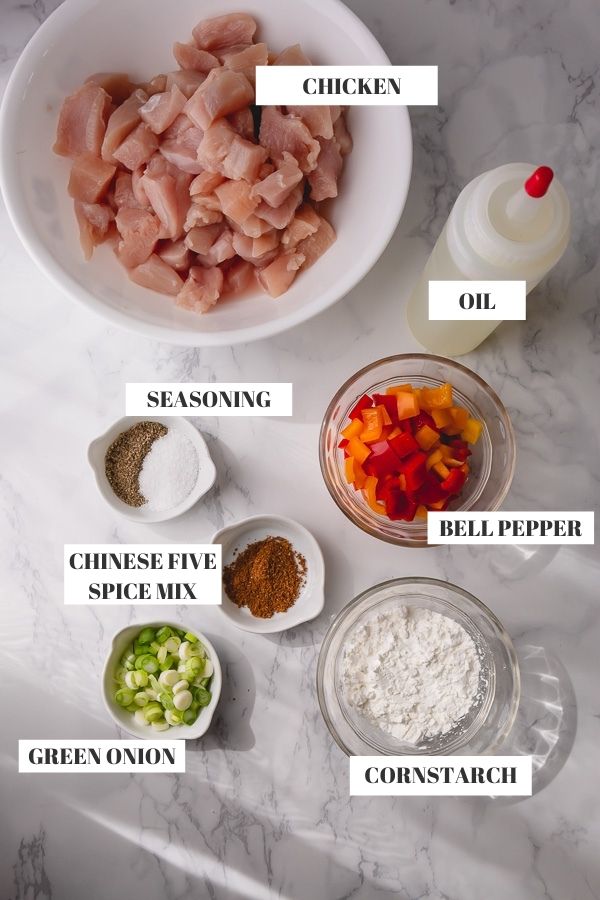
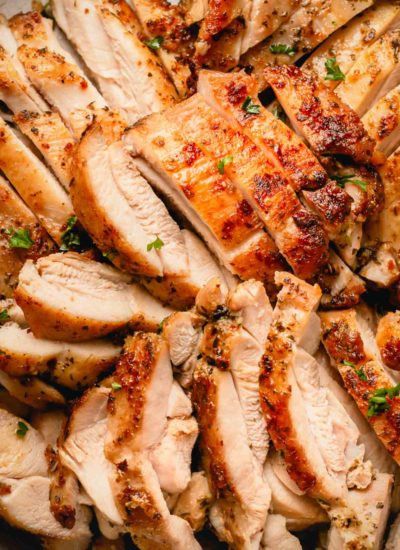
- Chicken – We prefer to use chicken thighs. They yield a more flavorful dish. Chicken breast also works as well. In fact, I used chicken breast in these photos. It’s really up to you!
- Chinese five spice mix – This traditional spice mix is made with cinnamon, fennel seeds, star anise, Sichuan peppercorn and cloves.
- Cornstarch – The key to a light and crisp crust is to use an even dusting of cornstarch on the chicken. I don’t recommend using all-purpose flour. Flour often results in a heavy, oil-logged crust instead of a light, crispy one.
- Peppers – Traditionally red and green chilies or jalapenos are used in Salt & Pepper Chicken. To keep this dish family-friendly, you can use red and green bell pepper instead. If you like it spicy, feel free to use chilis or jalapenos.
- Green Onions – Also called spring onions or scallions. You want to use only the white and pale green part from the lower half or 2/3 of the onion for sauteing. Reserve the darker green part from the top to slice for garnishing the finished dish.
How to make easy salt and pepper chicken
1. Prepare the chicken
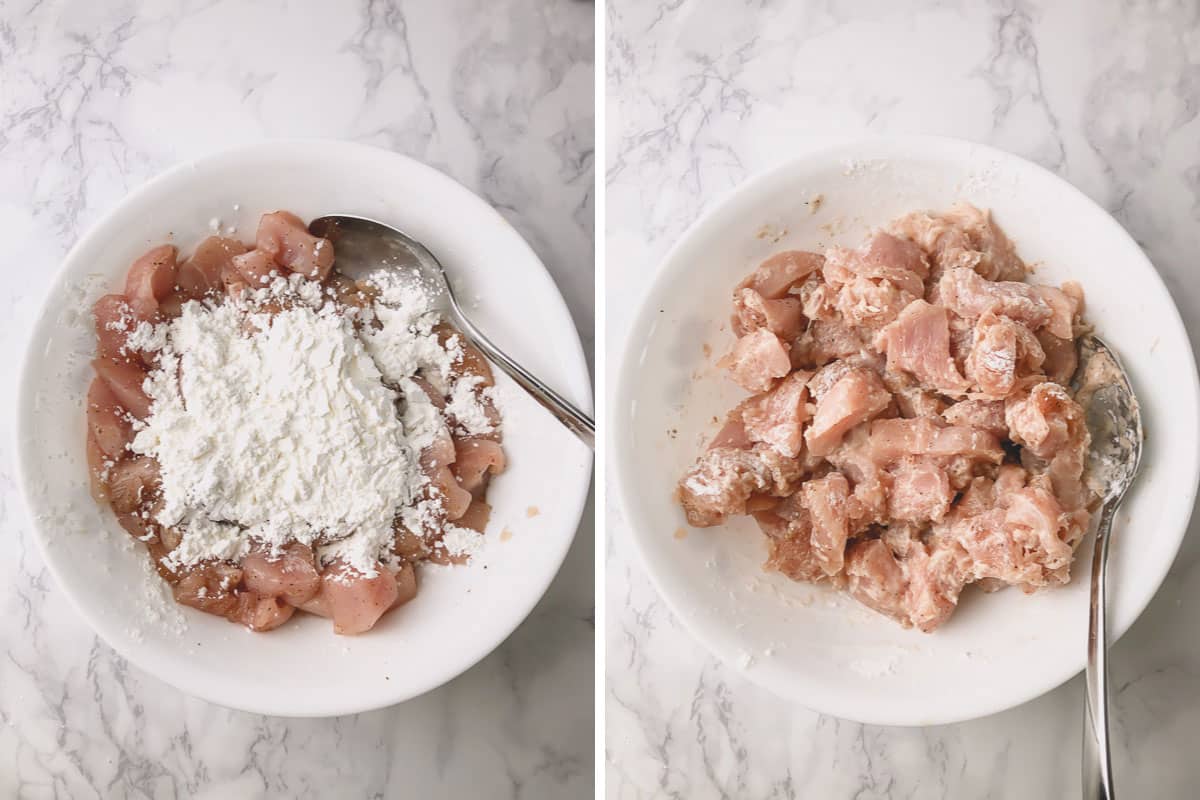
- Pat dry and cut chicken into bite-size pieces.
- Mix in the seasoning and marinate chicken for 5 minutes. Meanwhile prepare the vegetables.
- Add cornstarch to the marinated chicken and ensure each piece is coated.
2. Cook the chicken
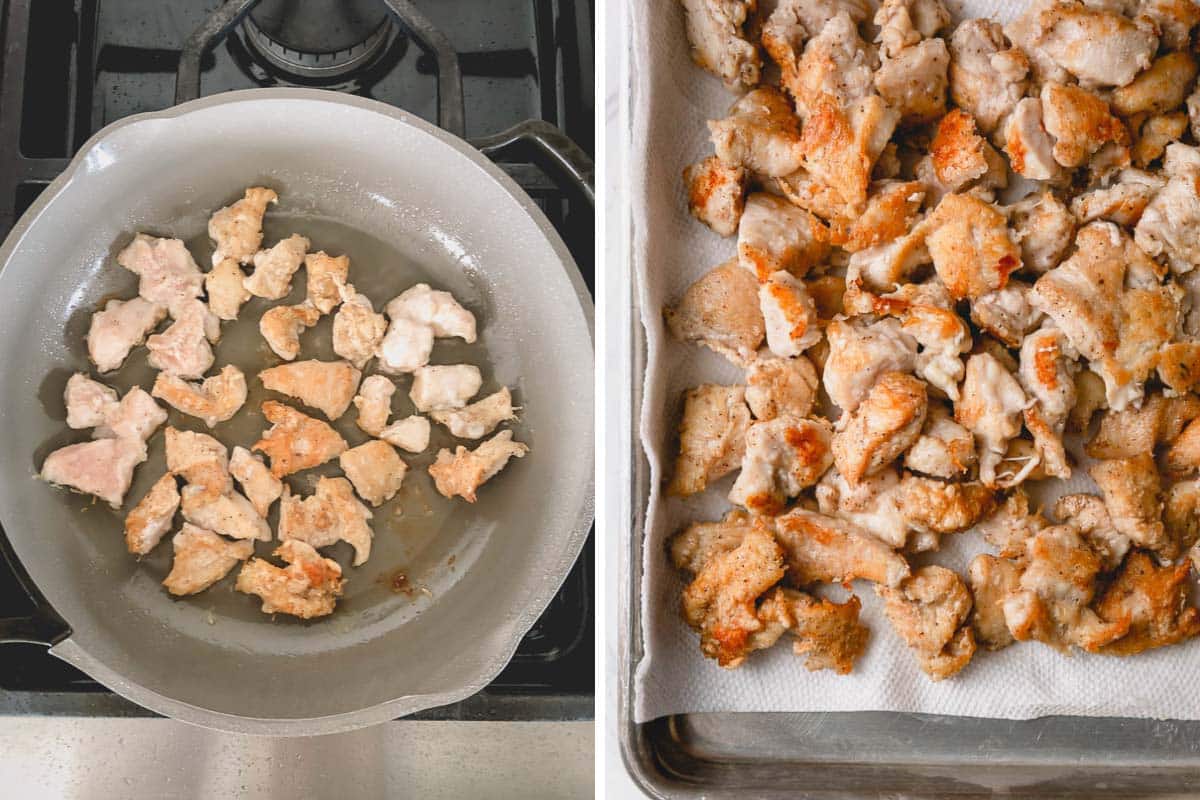
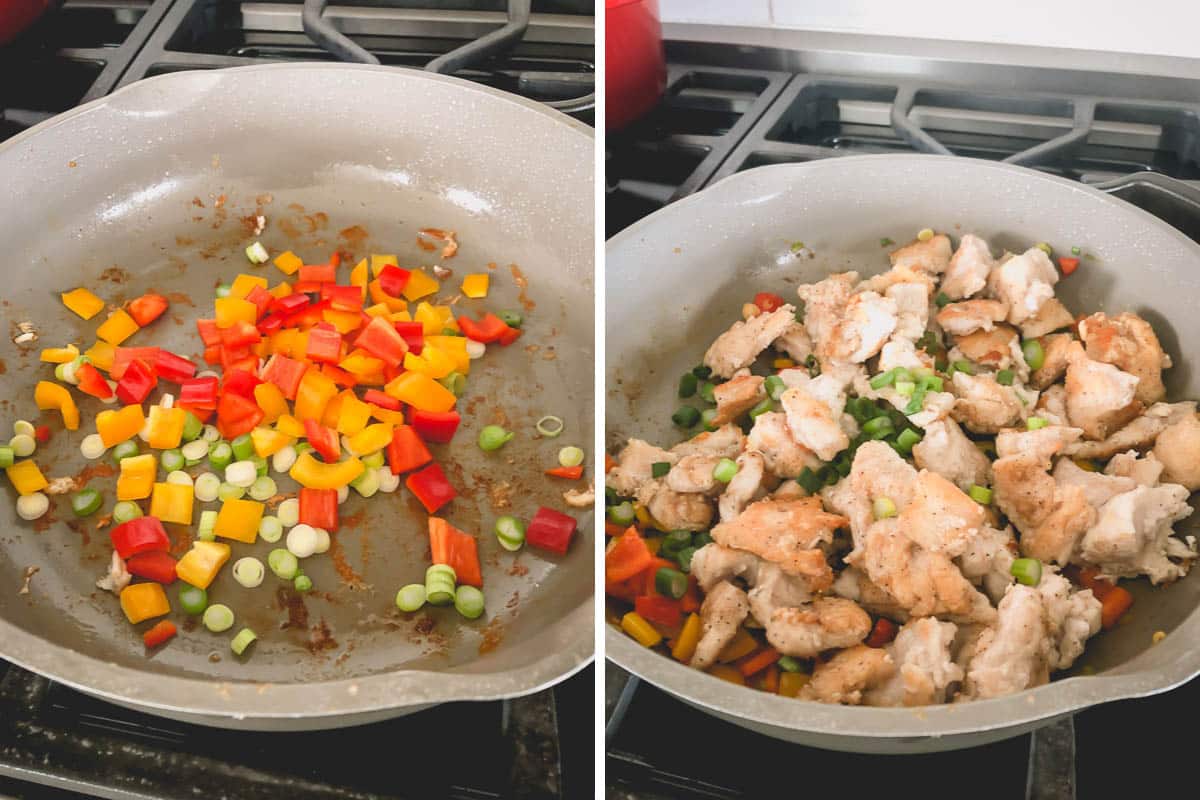
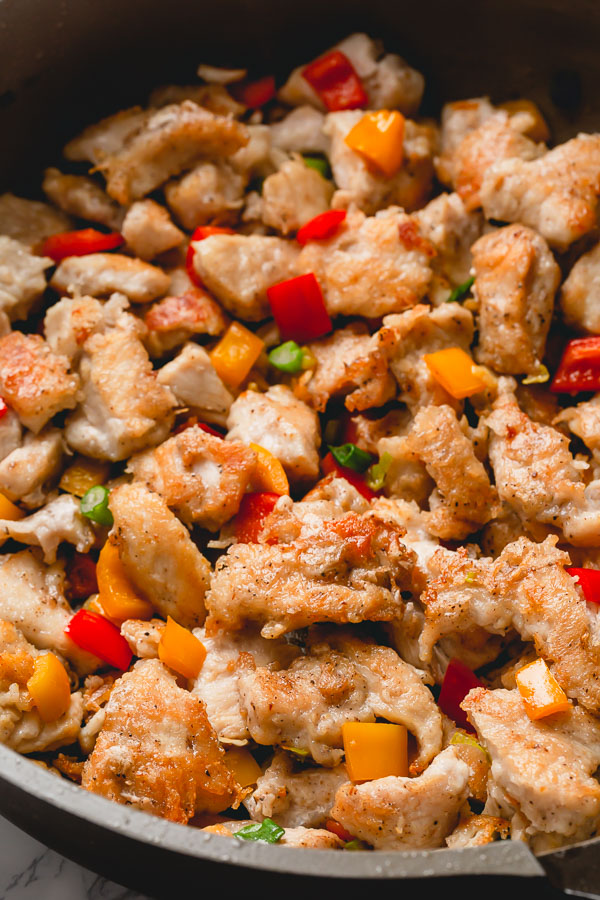
- Cook chicken pieces on medium-high heat in a skillet with oil. Work in batches. Remove chicken from skillet once done.
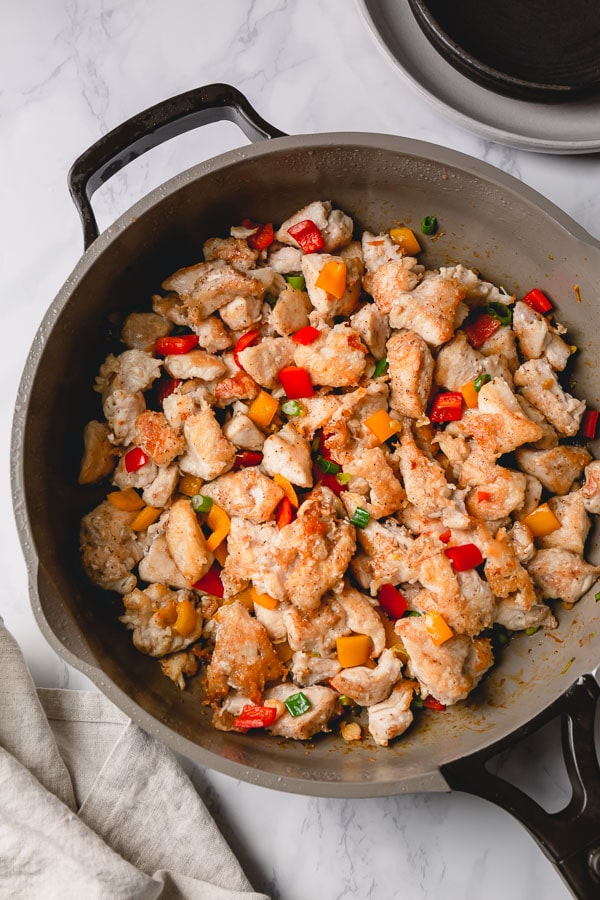
3. Cook the stir-fry
- Saute the peppers and green onion in the now-empty skillet for a minute or so.
- Then add chicken pieces back and cook for another minute or so.
TIME-SAVING TIPS:
- Marinade the chicken for up to 24 hours, covered, in the fridge.
- Slice the peppers up to 24 hours in advance. Store sliced peppers in an airtight container in the refrigerator until ready to use.
Side Dish Ideas:
Salt and pepper chicken is a versatile dish and pairs perfectly with variety of side dishes.
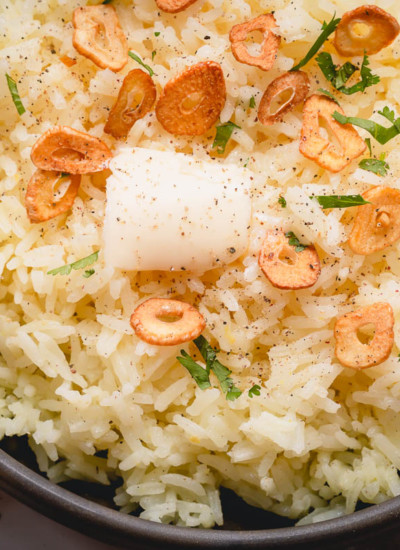
- Serve with either egg fried rice or vegetable fried rice.
- Serve on top of a bed of sesame noodles.
- For a lighter option, serve with steamed rice and oven-roasted mixed vegetables.
Storing Tips
- To store: Refrigerate the leftovers in an airtight container. When stored properly, leftover salt and pepper chicken will be at its best for up to 4-5 days.
- To reheat: Reheat leftover chicken in the microwave on high for about 2 minutes or on the stovetop over medium high heat for 5-7 minutes or until warmed through completely.
Salt & Pepper Chicken FAQs
Salt and pepper chicken is one of the classic menu items in almost all Chinese restaurants!
Traditionally, chicken pieces are dunked in a thick wet batter and deep fried in very hot oil. Then the deep fried chicken pieces are sautéed with chilies and finished with seasoned salt and pepper.
Yes, if you’re grilling, keep the chicken in one piece and simply marinate it in the spice mixture for up to 1 day.
To ensure your chicken is nice and crispy, follow these 3 steps:
– Use a little cornstarch – Coat the marinated chicken pieces evenly and completely
– Don’t overcrowd the pan. You want your chicken all in one layer, so each chicken piece gets brown nicely.
– Don’t move the chicken around too much. Let the chicken pieces cook undisturbed for 2 minutes. This will help develop color and crispiness. Flip the chicken and repeat on the other side as well.
More Busy Cooks Recipes
I hope you love this recipe as much as I do! Let me know once you’ve tried it by leaving a comment below or sharing a photo and tagging @busy_cooks on Instagram!

Salt and Pepper Chicken
Ingredients
- 1½ lbs. boneless, skinless chicken thighs Note 1
- 1 teaspoon table salt
- 1 teaspoon black pepper
- ½ teaspoon Chinese five spice mix
- 4 tablespoons cornstarch
- 3 tablespoons canola or vegetable oil
- ¼ cup finely diced red bell pepper (½ a large bell pepper)
- ¼ cup finely diced green bell pepper (½ a large bell pepper)
- 2 tablespoons sliced green onion (about 2)
Instructions
- Pat dry chicken thighs with paper towel and cut into bite-size pieces.
- In a small bowl, combine salt, black pepper and Chinese five spice mix. Mix well.
- Season chicken with the prepared seasoning mix.
- Let the chicken marinate for at least 5 minutes, while you prepare the vegetables. (You can marinade it up to 1 day, covered, in the fridge.)
- Add cornstarch to the marinated chicken and toss to coat, making sure each and every chicken piece is completely coated in cornstarch.
- Heat half of the oil in a wide skillet over medium high heat. Working in batches, arrange the chicken pieces in a single layer and fry for 2 minutes each side until golden. (Note: Do not move the chicken for 2 minutes. This will help develop color and crispiness.) Remove the cooked chicken onto a clean plate and repeat with the remaining oil and chicken. Keep the temperature of the oil steady at medium high and do not over crowd the pan, or they won’t get nice and golden.
- Once all the chicken pieces are fried, add the peppers and green onion (only the white and pale green part. Reserve the dark green part to garnish) to the now empty skillet.
- Sauté for a minute. Don’t overcook the peppers, as you want them to be crunchy.
- Add the fried chicken pieces back into the skillet and toss with the sautéed peppers for 30-45 seconds.
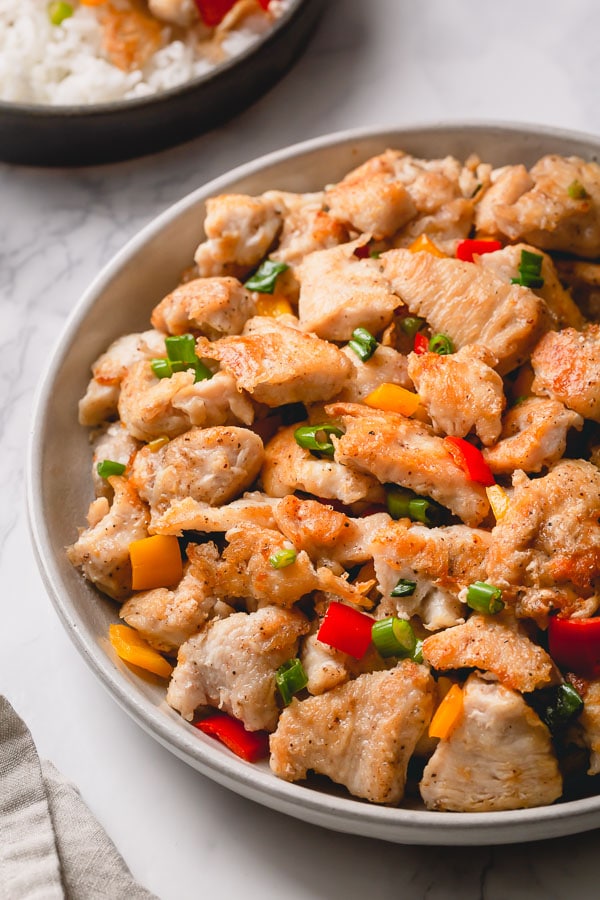
- Garnish with reserved green part of the scallions. And serve immediately with steamed or fried rice.
Notes
Nutrition
* Disclaimer: All nutrition information are estimates only. Read full nutrition disclosure.

Sharing of this recipe is encouraged and appreciated. Copying of full recipe to any social media is prohibited.
Stay connected and join Busy Cooks community:
FACEBOOK | PINTEREST | INSTAGRAM
This recipe was originally published on April 29, 2021.

Comments + Reviews